
Best Air Purifier Maintenance Tips to Buy in July 2026
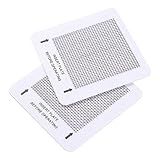
KingPavonini 2 Pack Ceramic Ozone Plates for Popular Home Air Purifiers 4.5" x 4.5" Air Fresh Replacement Parts
- UNIVERSAL COMPATIBILITY: FITS VARIOUS OZONE GENERATORS EFFORTLESSLY.
- HIGH OUTPUT: DELIVERS 3500MG/H FOR SUPERIOR ODOR ELIMINATION.
- LONG LIFESPAN: 8000 HOURS OF DURABLE PERFORMANCE, LESS FREQUENT CHANGES.


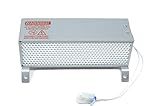
RCI Cell for Ecoquest Fresh Air 2, 3 Series, FreshAir Surround, GT 3000 (NOT for Vollara Air & Surface Pro Models)
2 Pack 3-in-1 HEPA Replacement Filter Compatible with Pure Enrichment PureZone Air Purifier Part No. PEAIRPLG
-
DESIGNED FOR PURE ENRICHMENT: PERFECT FIT FOR PUREZONE PURIFIER!
-
HIGH-QUALITY HEPA: CAPTURES 99.97% OF AIRBORNE PARTICLES!
-
HASSLE-FREE REPLACEMENT: EASY INSTALLATION WITHOUT TOOLS REQUIRED!
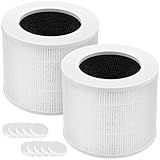
Core Mini Replacement Filter Compatible with LEVOIT Core Mini Air Purifier,Core Mini-P, 3-in-1 Replacement Filter, Replace Part #Core Mini-RF, 2 Filter & 10 Fragrance Sponge
-
PERFECT FIT: DESIGNED EXCLUSIVELY FOR LEVOIT CORE MINI & MINI-P.
-
ADVANCED 3-IN-1 FILTRATION: CAPTURES ULTRA-FINE PARTICLES & ODORS EFFECTIVELY.
-
COST-EFFECTIVE BUNDLE: INCLUDES 2 FILTERS & 10 AROMA PADS FOR ADDED VALUE.
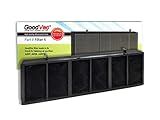
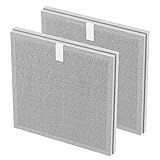
GOODVAC Replacement Odor Eliminator Filter Compatible with Oreck XL Tabletop Professional Pro Air Purifiers, Replaces AP1PKP. DOES NOT FIT AIR8 Models
- FITS ORECK XL AIRB, AIRP & AIRPS; EXCLUDES AIR8 MODELS.
- HIGH-QUALITY AFTERMARKET FILTER; ODOR-ABSORBING TECHNOLOGY.
- EASY REPLACEMENT FOR GENUINE ORECK AP1PKP FILTER.
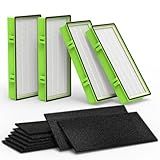
Colorfullife 4 True HEPA + 8 Pre-Filter Aer1 Filter Replacement Compatible With Holmes AER1 Air Purifiers, Replacement Parts # HAPF30AT, HAPF300AH-U4R, HAP242-NUC
- ULTIMATE CLEAN: TRUE HEPA H13 FILTERS CAPTURE 99.97% OF PARTICLES.
- ODOR ELIMINATION: CARBON PRE-FILTERS TACKLE ODORS FROM PETS AND SMOKE.
- WIDE COMPATIBILITY: FITS MULTIPLE BIONAIRE AND HOLMES AIR PURIFIER MODELS.
Maintaining the pre-filter of an air purifier is essential for the efficient functioning of the device. Here are a few steps to help you keep the pre-filter clean:
- Regular cleaning: The pre-filter should be cleaned on a regular basis to remove accumulated dust, dirt, and larger particles. It is recommended to clean it once every three to four weeks, or more frequently if you live in a particularly polluted area.
- Unplug the air purifier: Always disconnect the air purifier from the power source before attempting to clean the pre-filter. This is crucial for safety reasons.
- Remove the pre-filter: Most air purifiers have a removable pre-filter that is easily accessible. Read the manufacturer's instructions to locate and remove the pre-filter properly.
- Vacuum the pre-filter: Use a vacuum cleaner with a brush attachment to remove loose dirt and debris from the pre-filter. Make sure to gently vacuum both sides of the filter to ensure thorough cleaning.
- Wash the pre-filter: After vacuuming, fill a basin with lukewarm water and a mild detergent. Submerge the pre-filter in the soapy water and gently agitate it to dislodge any remaining dirt. Let it soak for about 15 minutes.
- Rinse the pre-filter: After soaking, rinse the pre-filter under running water to remove any soap residue. Ensure that all detergent is thoroughly rinsed off before proceeding.
- Dry the pre-filter: Gently squeeze out excess water from the pre-filter. Do not wring or twist it as this may damage the filter fibers. Place the pre-filter in a well-ventilated area and let it air dry completely. It is important to ensure the filter is completely dry before reinserting it into the air purifier.
- Reinstall the pre-filter: Once the pre-filter is dry, reinsert it back into the air purifier according to the manufacturer's instructions. Make sure it is correctly aligned and securely fitted.
- Monitor the pre-filter: Keep an eye on the condition of the pre-filter between cleanings. If it becomes excessively dirty or damaged, it may need to be replaced sooner than usual. Consult the air purifier's manual to determine the recommended replacement schedule.
Regularly maintaining the pre-filter of your air purifier will help extend its lifespan and ensure optimal performance. It will also provide cleaner and healthier air for you and your family.
What is the difference between a pre-filter and a HEPA filter?
A pre-filter and a HEPA filter are both types of filters used in air purifiers or HVAC systems, but they differ in terms of their functionality and purposes:
Pre-filter:
- Function: A pre-filter is the first line of defense in an air purifier or HVAC system. It captures larger particles like dust, pet hair, and lint before they reach the HEPA filter, prolonging its lifespan.
- Materials: Pre-filters are typically made of a coarse, porous material such as foam, mesh, or synthetic fibers.
- Efficiency: While pre-filters can capture larger particles effectively, they have limited ability to trap smaller particles like allergens, bacteria, or mold spores.
- Maintenaonce: Pre-filters are relatively easy to clean or replace since they mainly collect larger particles. They need to be cleaned or replaced periodically, depending on the air quality and usage.
- Purpose: The primary purpose of a pre-filter is to protect and extend the life of the main HEPA filter by preventing it from clogging with larger particles.
HEPA filter (High Efficiency Particulate Air filter):
- Function: A HEPA filter is a highly efficient filter designed to remove extremely small particles from the air. It can capture particles as small as 0.3 micrometers with an efficiency rating of 99.97%.
- Materials: HEPA filters are made of very fine fibers, usually glass fibers, arranged in a dense maze-like structure that traps microscopic particles.
- Efficiency: HEPA filters are highly effective at capturing various allergens, fine dust, pollen, mold spores, pet dander, and other small particles present in the air.
- Maintenance: HEPA filters have a longer lifespan but eventually require replacement since they become clogged over time and lose their efficiency. The replacement interval depends on factors like usage, air quality, and the specific model of the filter.
- Purpose: The main purpose of a HEPA filter is to improve indoor air quality by removing tiny particles and allergens, making the air cleaner and healthier to breathe.
In summary, the pre-filter acts as a preliminary filter that removes larger particles to protect the more sensitive and efficient HEPA filter, which is designed to capture smaller particles and allergens from the air.
What are the alternatives to cleaning a pre-filter?
There are several alternatives to cleaning a pre-filter:
- Replace the pre-filter: Instead of cleaning the pre-filter, you can simply replace it with a new one. This is often the easiest and most effective solution, especially if the pre-filter is heavily soiled or damaged.
- Shake or tap the pre-filter: If the pre-filter is not too dirty, you can try removing loose particles by gently shaking or tapping it. This can help dislodge dust, dirt, and debris, making it easier to clean or extending its usability.
- Vacuum the pre-filter: Using a vacuum cleaner with a brush attachment, you can gently vacuum the pre-filter to remove dust and debris. Ensure to use low suction and be careful not to damage the filter material.
- Compressed air blowout: If available, you can use compressed air to blow out the pre-filter. This can help dislodge and remove trapped particles. Make sure to follow safety precautions and use appropriate air pressure.
- Wash the pre-filter: Some pre-filters are washable. Before attempting to wash, check the manufacturer's instructions to ensure it is suitable for washing. If permitted, gently rinse the pre-filter with water, or use a mild detergent if necessary. Allow it to air dry completely before reinstalling.
Remember, pre-filters are meant to capture larger particles and extend the lifespan of the main filter. Regularly replacing or cleaning the pre-filter will help maintain the efficiency of your filtration system.
What is the cost of replacing a pre-filter?
The cost of replacing a pre-filter can vary depending on various factors such as the brand, model, and where it is being purchased from. On average, the cost of a pre-filter can range anywhere from $10 to $50.
How to dry the pre-filter after cleaning?
To dry the pre-filter after cleaning, follow these steps:
- Gently remove the pre-filter from the appliance or device it is attached to.
- Shake off any excess water or debris from the pre-filter.
- Lay the pre-filter on a clean and dry surface such as a countertop or table.
- Allow the pre-filter to air dry naturally. This may take a few hours to overnight, depending on the humidity levels in your home.
- Avoid placing the pre-filter in direct sunlight or using any artificial heat sources such as a hairdryer, as excessive heat can cause damage.
- Once the pre-filter is completely dry, inspect it to ensure there is no remaining moisture or dirt.
- Carefully reattach the pre-filter to the device or appliance according to the manufacturer's instructions.
It's important to regularly clean and dry the pre-filter to maintain its effectiveness in trapping dust, dirt, and other particles.
How to remove the pre-filter from the air purifier?
The process for removing the pre-filter from an air purifier may vary depending on the specific model and brand. However, here are general steps that can help guide you:
- Locate the air purifier's filter housing or access panel. This is usually on the back or side of the unit.
- Check if there are any latches, screws, or tabs that need to be released or undone to open the housing or access panel.
- Once the housing or panel is open, you should be able to see the pre-filter, which is the first layer of filtration.
- Carefully remove the pre-filter by pulling it out or sliding it out of its designated spot. Be gentle to avoid damaging the filter or any surrounding components.
- Some pre-filters can be washed and reused, while others might need to be replaced. Check the manufacturer's instructions for your specific air purifier model to determine if the pre-filter is reusable or disposable.
- If the pre-filter is reusable, rinse it under running water or clean it according to the manufacturer's guidelines. Let it dry completely before putting it back in.
- To reinstall the pre-filter, slide it back into its original position or attach it as instructed by the manufacturer.
- Close the filter housing or access panel securely, ensuring that it is properly sealed to maintain the air purifier's efficiency.
Remember to consult your air purifier's manual or contact the manufacturer directly for precise instructions tailored to your specific device.
What cleaning agents should I avoid using on the pre-filter?
When cleaning a pre-filter, it is important to avoid using cleaning agents that could potentially damage or degrade the filter material. Here are some cleaning agents to avoid:
- Bleach: Bleach can cause the pre-filter material to weaken and deteriorate over time.
- Harsh chemicals: Avoid using strong cleaning chemicals such as ammonia, chlorine, or acids, as they can damage the pre-filter.
- Abrasive cleaning agents: Avoid using abrasive cleaners or scrub brushes, as they can cause tears or damage to the pre-filter material.
- Hot water: Using hot water can shrink or warp the pre-filter material, leading to inefficiency or reduced lifespan.
Instead, it is recommended to clean the pre-filter with mild soap or detergent and cool or lukewarm water. Gently hand-wash the pre-filter and rinse it thoroughly to remove any residue. Allow it to air dry completely before reinstalling it.