
Best Electrical Installation Kits for Outdoor Sheds to Buy in July 2026
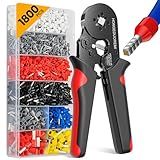
Ferrule Crimping Tool Kit,Wire Ferrule Kit Crimper Connectors,4 corners Self-adjustable AWG23-7 gauge 1800PCS Ferrules Electrical Terminal,Crimpers Tools Pin Terminals Ratchet Pliers for Audio,Car,DIY
-
COMPLETE KIT OF 1800 FERRULES FOR MULTIPLE WIRING PROJECTS!
-
HIGH-QUALITY COPPER & NYLON FOR SAFETY AND DURABILITY!
-
COLOR-CODED FOR EASY USE-BOOSTS EFFICIENCY INSTANTLY!


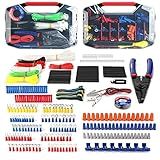
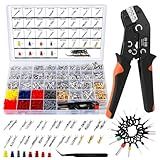
WORKPRO 582-piece Crimp Terminals, Wire Connectors, Heat Shrink Tube, Electrical Repair Kit with Wire Cutter Stripper
- COMPLETE SET WITH WIRE CUTTER STRIPPER FOR SEAMLESS USE.
- UL-CERTIFIED TERMINALS ENSURE HIGH-QUALITY AND SAFE CONNECTIONS.
- VERSATILE FOR INSULATION, BUNDLING, AND RELIABLE REPAIRS.
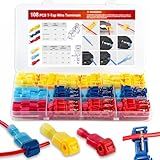
108 Pcs T-Tap Wire Connectors Kit, Quick Splice Self-Stripping Electrical Wire Terminals for Speaker Car Audio, Nylon Fully Insulated Male Quick Disconnects for Automotive Wiring (22-10 AWG)
-
QUICK AND EASY WIRING: SELF-STRIPPING CONNECTORS SIMPLIFY INSTALLATIONS.
-
DURABLE QUALITY: THICKENED COPPER CONTACTS ENSURE LONG-LASTING CONNECTIONS.
-
VERSATILE KIT: 54 CONNECTORS MEET ALL AUTOMOTIVE AND HOME WIRING NEEDS.
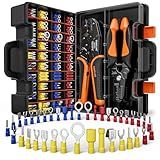
SOMELINE Wire Terminals Crimping Tool, with 39 Sizes Insulated Ratcheting Terminals Crimper Kit of AWG 22-10 Insulated Electrical Butt Bullet Spade Fork Ring Spade Splice Crimp Terminals
-
COMPREHENSIVE KIT: 39 CRIMP CONNECTORS FOR VERSATILE APPLICATIONS.
-
SAFETY ASSURED: UL LISTED CONNECTORS ENSURE HIGH CONDUCTIVITY AND SAFETY.
-
ERGONOMIC DESIGN: ADJUSTABLE TOOL WITH NON-SLIP GRIP FOR EASY USE.
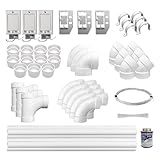
Central Vac Electric Installation Kit (3), 80 ft. of Pipe
- COMPLETE INSTALLATION KIT FOR A HASSLE-FREE VACUUM SYSTEM SETUP!
- VERSATILE INLETS AND DIRECT CONNECT COMPATIBILITY FOR ALL HOSES!
- HIGH-QUALITY COMPONENTS ENSURE EFFICIENT AND LASTING PERFORMANCE!
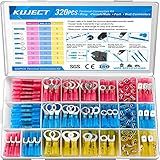
Kuject 320PCS Heat Shrink Wire Connectors Kit, Electrical Waterproof Crimp Butt Terminals, Insulated Spade Connectors for Automotive Marine Boat Truck, Include Rings Forks Spade Butt Splices
-
VERSATILE KIT: MEETS ALL YOUR WIRING NEEDS WITH RING, FORK, AND SPADE CONNECTORS.
-
DURABLE DESIGN: PREMIUM COPPER ENSURES STRONG CONNECTIONS AND LONG-LASTING USE.
-
WATERPROOF SEAL: ADHESIVE TUBING PROTECTS CONNECTIONS IN ALL ENVIRONMENTS.
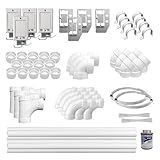
Central Vac Electric Installation Kit (4), 110 ft. of Pipe
-
COMPLETE KIT: EVERYTHING YOU NEED FOR EASY CENTRAL VACUUM INSTALLATION!
-
VERSATILE DESIGN: COMPATIBLE WITH ALL DIRECT CONNECT HOSES AVAILABLE.
-
FLEXIBLE OPTIONS: CHOOSE FROM VARIOUS INLET AMOUNTS FOR YOUR SPACE.
aopule 1379PCS Pin Connector Kit, Electrical Pins Connectors with Crimp Tool,28 Types 1/1.5/1.8/2.2/2.3/2.8/3.5mm Removal Male Female Crimp Pins
-
COMPREHENSIVE 1379-PIECE KIT FOR ALL YOUR AUTOMOTIVE NEEDS!
-
DURABLE BRASS & SILICONE MATERIALS FOR LONG-LASTING PERFORMANCE!
-
WIDE COMPATIBILITY WITH CARS, BIKES, AND ELECTRIC VEHICLES!
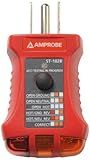
Amprobe Home Electric Installation Kit
- EASILY TEST SOCKETS WITH A SINGLE BUTTON FOR QUICK VERIFICATION!
- DETECT 5 WIRING FAULTS TO ENSURE SAFE AND RELIABLE OUTLETS.
- UL AND CSA CERTIFIED FOR TRUSTED SAFETY AND PERFORMANCE.
When installing electricity in an outdoor storage shed, it is important to do so safely to prevent any accidents or electrical hazards. Begin by ensuring the shed is properly wired to safely handle electricity. This may involve running underground wires from the main power source to the shed, or using an extension cord connected to a nearby outlet.
Next, install a weatherproof electrical junction box inside the shed where you can safely connect the wires. Make sure to use waterproof outlets, switches, and fixtures to prevent any exposure to moisture. It is also important to install a ground fault circuit interrupter (GFCI) outlet to protect against electrical shocks.
When working with electricity, always turn off the power at the main circuit breaker before making any connections. Use proper wiring techniques and materials, and follow all local building codes and regulations. If you are unsure about how to safely install electricity in your outdoor shed, it is best to consult with a professional electrician.
How to safely install a timer switch in a shed?
- Turn off the power to the shed at the main electrical panel.
- Determine the location where you want to install the timer switch and ensure that there is enough space and proper wiring to accommodate it.
- Remove the cover plate from the existing switch or outlet where you will be installing the timer switch.
- Carefully disconnect the wires from the existing switch or outlet and remove it from the wall.
- Install the new timer switch according to the manufacturer's instructions. Make sure to connect the wires properly and securely.
- Attach the timer switch to the wall using the screws provided.
- Install the cover plate on the timer switch.
- Turn the power back on at the main electrical panel and test the timer switch to ensure that it is working properly.
- If you are unsure about any step of the installation process, consult a professional electrician for assistance to ensure the safety and proper function of the timer switch.
How to safely install a subpanel in a shed?
- Plan the layout: Decide where you want to install the subpanel in your shed. Make sure it is easily accessible and allows for proper ventilation around the panel.
- Turn off power: Before starting any installation work, turn off the power supply to the shed. This will help prevent any accidents or electric shocks.
- Install the subpanel: Mount the subpanel on a sturdy surface using screws or mounting brackets. Make sure it is securely attached to the wall or a wooden board.
- Connect the wiring: Carefully follow the manufacturer's instructions for connecting the wiring to the subpanel. This may involve running wires from the main panel to the subpanel and connecting them to the appropriate terminals.
- Grounding: Make sure the subpanel is properly grounded to prevent electrical shocks. Connect the ground wire to the grounding bus bar in the subpanel.
- Test the subpanel: After all the wiring is connected, turn the power supply back on and test the subpanel to make sure it is working properly. Check for any loose connections or faulty wiring.
- Secure the panel cover: Once everything is tested and working correctly, secure the panel cover to protect the wiring and connections inside the subpanel.
- Label the circuits: Properly label each circuit in the subpanel to make it easy to identify and troubleshoot any issues in the future.
- Follow local codes and regulations: Make sure to follow all local building codes and regulations when installing a subpanel in your shed. This will help ensure the safety and compliance of your electrical system.
How to safely install a light fixture in an outdoor shed?
Here are some steps to safely install a light fixture in an outdoor shed:
- Make sure the power is turned off to the shed at the circuit breaker before beginning any work.
- Choose a suitable location for the light fixture that is easily accessible and provides adequate lighting.
- Mount the light fixture according to the manufacturer's instructions, using appropriate screws and mounting hardware.
- Run the electrical wiring from the power source to the light fixture, making sure to use outdoor-rated wiring and connectors.
- Connect the wiring to the light fixture according to the manufacturer's instructions, typically black wire to black wire and white wire to white wire.
- Secure the wiring in place using electrical tape or cable ties to prevent any movement or damage.
- Double check all connections to ensure they are secure and the wiring is properly insulated.
- Turn the power back on at the circuit breaker and test the light fixture to ensure it is working properly.
- If you are not confident in your electrical abilities, it is recommended to hire a licensed electrician to install the light fixture for you. Safety should always be the priority when working with electricity.