Best Ceiling Fans to Buy in July 2026
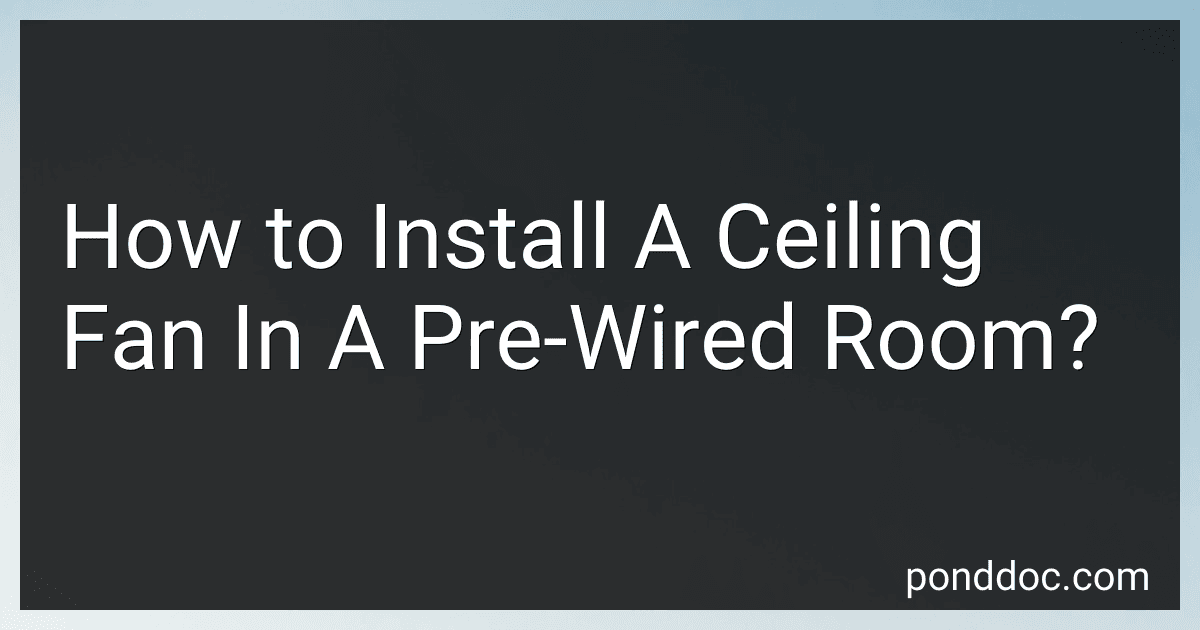
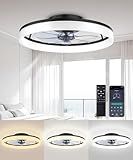
Amico Ceiling Fans with Lights, 42 inch Low Profile Ceiling Fan with Light and Remote Control, Flush Mount, Reversible, 3CCT, Dimmable, Noiseless, Black Ceiling Fan for Bedroom, Indoor/Outdoor Use
- ENERGY-EFFICIENT DESIGN: SAVE UP TO 80% ON ELECTRICITY COSTS!
- ULTRA-QUIET OPERATION: ENJOY SERENE COMFORT WITH JUST 35DB NOISE.
- CUSTOMIZABLE LIGHTING: DIMMABLE WITH THREE COLOR TEMPERATURES FOR ANY MOOD.


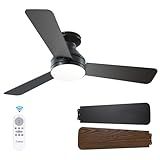
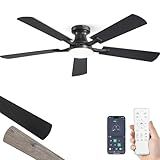
Ohniyou Ceiling Fans with Lights, 52'' Low Profile Ceiling Fan with Light and Remote/APP Control, Modern Flush Mount Ceiling Fan for Indoor Bedroom Living Room, Dimmable, Qiuet DC Motor, Black
- CONTROL VIA APP OR REMOTE FOR ULTIMATE CONVENIENCE AND EASE.
- ULTRA-QUIET MOTOR DELIVERS POWERFUL AIRFLOW WITH MINIMAL NOISE.
- STYLISH DUAL-COLOR BLADES FIT ANY DECOR; BLENDS IN BEAUTIFULLY.
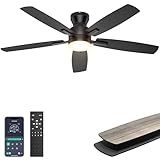
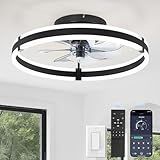
CubiCubi Ceiling Fans with Lights, 42 Inch Low Profile Ceiling Fan with Light and Remote/APP Control, Flush Mount, Stepless Dimmable, 6 Speeds, Quiet, LED Smart Ceiling Fans for Indoor Bedroom, Black
- STYLISH RETRO DESIGN MATCHES MODERN AND INDUSTRIAL DECOR.
- CONVENIENT ONE-TOUCH REMOTE & APP CONTROL WITH 6 SPEED SETTINGS.
- ENERGY-EFFICIENT MOTOR SAVES UP TO 80% ENERGY OVER TRADITIONAL FANS.
AQUBT Ceiling Fans with Lights and Remote, 20" Modern Low Profile Ceiling Fan with Light, Stepless Color Temperature Change and 6 Speeds for Bedroom, Kids Room and Living Room (Black)
-
CONTROL EASILY VIA REMOTE OR APP; 360° DATA RECEPTION, NO OBSTACLES.
-
ENJOY STEPLESS DIMMING; 3 LIGHTING MODES ADJUST FROM 10% TO 100%.
-
QUIET 6-SPEED FAN WITH REVERSIBLE AIR FLOW FOR YEAR-ROUND COMFORT.
ZMISHIBO Ceiling Fans with Lights and Remote, 19.7'' Low Profile Ceiling Fan, 3000-6000K Dimmable Modern Flush Mount LED Fan Light, 6 Wind Speeds, Black Fandelier Ceiling Fans for Bedroom
-
CUSTOMIZABLE LIGHTING & MEMORY FUNCTION: SET YOUR IDEAL AMBIANCE!
-
SMART CONTROL OPTIONS: REMOTELY ADJUST FAN AND LIGHT WITH EASE.
-
WHISPER-QUIET OPERATION: ENJOY STRONG AIRFLOW WITHOUT THE NOISE!
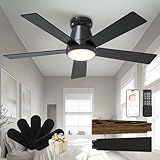
ZMISHIBO 52 Inch Ceiling Fan with Light, App&Remote Control, Flush Mount Low Profile, Dimmable 20W LED Light, Quiet Reversible Motor for Bedroom, Living Room, Apartment, Black
-
IDEAL FOR ANY ROOM: 52-INCH FAN COOLS AND ILLUMINATES LARGE SPACES.
-
SMART CONTROL OPTIONS: APP & REMOTE CONTROL WITH DIMMING AND MEMORY.
-
WHISPER-QUIET OPERATION: ENJOY STRONG AIRFLOW WITHOUT DISRUPTIVE NOISE.
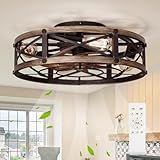
SHLUCE 19" Farmhouse Flush Mount Caged Ceiling Fans with Lights, 6 Speeds, Rustic Low Profile Ceiling Fan with Light and Remote, Small Bladeless Ceiling Fans with Lights for Kitchen, Bedroom - ETL
- REMOTE CONTROL & INDEPENDENT LIGHTING: 6 SPEEDS & ADJUSTABLE LIGHTS!
- ULTRA-QUIET MOTOR: ENJOY POWERFUL AIRFLOW UNDER 30 DECIBELS.
- EASY INSTALLATION: ALL HARDWARE INCLUDED FOR QUICK SETUP!
Installing a ceiling fan in a pre-wired room is a relatively straightforward process. Here are the steps involved:
- Start by turning off the power supply to the room at the circuit breaker to ensure safety.
- Carefully unpack the ceiling fan kit and read the instruction manual thoroughly before beginning the installation process.
- Locate the junction box in the ceiling where the fan will be installed. Remove the existing light fixture, if any, from the junction box.
- Examine the wires in the junction box to ensure they are in good condition. If any wires are damaged or frayed, make sure to replace them before proceeding.
- Identify the green or copper grounding wire from the fan. Connect it to the grounding wire in the ceiling using a wire nut.
- Locate the white neutral wire from the fan and connect it to the white neutral wire in the ceiling. Use a wire nut to secure the connection.
- Connect the black or blue wire from the fan to the black live wire in the ceiling, using a wire nut.
- If your fan has a separate light kit, connect its wires (usually blue and white) to the corresponding wires in the ceiling. Secure the connections with wire nuts.
- Gently tuck all the wires into the junction box, ensuring they are not pinched or damaged. Carefully attach the fan canopy to the mounting bracket, securing it in place using screws.
- Double-check that all the connections are secure and properly insulated. Gently pull on the wires to ensure they are securely attached.
- Attach the fan blades to the fan motor according to the manufacturer's instructions.
- Turn the power back on at the circuit breaker and test the fan to ensure it is functioning correctly. If necessary, adjust the settings and balance the fan blades for optimal performance.
Remember to always follow the manufacturer's instructions and consult a professional if you are uncertain about any part of the installation process.
What is the purpose of the ceiling fan's mounting bracket?
The purpose of the ceiling fan's mounting bracket is to securely attach and support the fan to the ceiling. The mounting bracket is usually installed on an electrical junction box or a specially designed fan-rated box that is securely attached to the ceiling structure. It provides stability and ensures the fan's weight is properly distributed, preventing the fan from falling or wobbling during operation. Additionally, the mounting bracket allows for proper electrical connections between the fan and the ceiling wiring, allowing it to safely function.
How to choose the appropriate ceiling fan style to match the room decor?
Choosing the appropriate ceiling fan style to match your room decor involves considering several factors. Here's a step-by-step guide to help you:
- Assess Your Room Decor: Take a good look at your room's overall style, including the color scheme, furniture, and any decorative elements. Determine the primary theme or style of the room, such as modern, traditional, rustic, coastal, or industrial.
- Determine the Desired Role of the Fan: Decide whether you want the ceiling fan to blend seamlessly with the decor or make a statement as a focal point. This will help guide you in choosing a style that complements or contrasts with the room's aesthetics.
- Consider the Finishes: Look at the existing finishes in the room, such as wood, metal, or glass. Choose a ceiling fan with corresponding finishes to create a cohesive look. For example, for a room with wood furniture, opt for a fan with a matching wood blade or finish.
- Take Note of the Blades: Consider the blade design and material. Blades often come in different shapes, sizes, and finishes. Look for blades that enhance the style of the room-sleek and minimalistic for a modern room or distressed and natural for a rustic vibe.
- Pay Attention to the Lighting: Ceiling fans often come with integrated lighting fixtures or have optional light kits. Ensure the lighting style aligns with the room decor. For instance, modern rooms might benefit from a fan with built-in LED lights, while vintage-inspired rooms might suit fans with glass shades.
- Size Matters: Consider the size of the room before selecting a fan. A small room might need a compact fan with a low-profile design, while larger rooms or high ceilings could accommodate larger fans with more decorative details.
- Research and Compare: Browse through home improvement websites, catalogs, or retail stores to explore different options. Compare the available styles, features, and prices while keeping your room decor in mind. Look for inspiration by viewing pictures of rooms with similar styles.
- Seek Professional Advice: If you're unsure about making the right choice, consult an interior designer or a knowledgeable salesperson. They can provide valuable insights and help you find the perfect ceiling fan to match your room decor.
Remember, choosing a ceiling fan style is a personal preference, and ultimately, you should select an option that resonates with your own style and preferences while enhancing the overall look and feel of the room.
How to test the pre-wired connections for a ceiling fan's electrical power?
To test the pre-wired connections for a ceiling fan's electrical power, follow these steps:
- Turn off the power: Before testing any electrical connections, ensure that the power to the electrical circuit is turned off. Locate the circuit breaker or fuse box and turn off the corresponding breaker or remove the fuse.
- Remove the ceiling fan cover: Unscrew or unclip the cover of the ceiling fan to access the electrical connections.
- Inspect the wiring: Once the cover is removed, visually inspect the wiring connections to ensure they are properly installed and secure. Look for any loose or damaged wires, loose wire nuts, or exposed copper wiring.
- Use a voltage tester: Obtain a non-contact voltage tester or a multimeter to test the electrical power of the pre-wired connections. A non-contact voltage tester detects the presence of live electrical current by simply placing it near the wires without making direct contact. A multimeter can measure both the voltage and continuity of the electrical circuit. Be sure to follow the instructions provided by the manufacturer when using these tools.
- Test for power: Turn on the power to the circuit. Carefully bring the non-contact voltage tester close to each wire connection, starting with the wires connected to the ceiling. If the voltage tester beeps or lights up, it indicates the presence of live electrical current. Use a multimeter to measure the voltage if it is available.
- Check continuity: If you are using a multimeter, set it to test continuity. Touch one probe to the hot wire (usually black or red) and the other probe to the neutral wire (usually white). A reading of zero or very low resistance indicates continuity, indicating that the circuit is properly wired.
- Repeat for other wire connections: Repeat the process for each wire connection, including the switched hot wire (usually blue or black) and any grounding wires (usually green or bare copper). Ensure that all connections have proper power and continuity.
- Ensure safety precautions: Always prioritize safety while working with electricity. Use insulated tools, wear safety goggles, and follow proper electrical safety guidelines. If you're not confident or comfortable working with electricity, consulting a professional electrician is highly recommended.
It's important to note that these instructions may vary depending on your specific ceiling fan model or electrical system. Always consult the manufacturer's instructions and local electrical codes for guidance.
How to select the appropriate ceiling fan speed for desired comfort?
To select the appropriate ceiling fan speed for desired comfort, consider the following steps:
- Understand the different fan speeds: Most ceiling fans have three or more speed settings. Typically, they are labeled as low, medium, and high. Learn the specific speed settings of your ceiling fan.
- Consider the ambient temperature: The fan speed you choose will depend on the temperature in the room. If it's a hot day, you might want to set the fan to a higher speed to create a stronger breeze. If it's just mildly warm, a medium speed may be sufficient. On cooler days, a low speed could provide a gentle breeze without cooling the room too much.
- Assess the room size: Larger rooms may require higher fan speeds to circulate the air effectively. If the room size is small, a lower speed may be enough to maintain comfort.
- Consider the height of the ceiling: Ceiling fan speed can be affected by the height of the ceiling. In rooms with higher ceilings, it might be necessary to set the fan on a higher speed to ensure enough air movement and comfort.
- Personal preference: Ultimately, personal preference plays a significant role in selecting the appropriate fan speed. Some individuals may prefer a stronger breeze, while others may prefer a gentler airflow. Experiment with different fan speeds to find the level of comfort that suits your preferences.
- Use the fan's remote control or switch: Depending on your ceiling fan model, you can adjust the speed using a remote control or a switch on the wall. Start with the lowest speed and gradually increase until you reach your desired comfort level.
Remember, ceiling fans do not actually cool the air but create a wind-chill effect that makes you feel cooler. So, it's important to find the right balance between comfort and energy efficiency based on the factors mentioned above.
What is the significance of balancing the ceiling fan blades for smooth operation?
Balancing the ceiling fan blades is significant for several reasons:
- Smooth operation: When the blades are properly balanced, the fan will rotate smoothly without any wobbling or shaking. This results in a quieter operation and prevents the fan from producing annoying noises or vibrations.
- Energy efficiency: An imbalanced ceiling fan can cause the motor to work harder than necessary to keep the blades rotating, leading to increased energy consumption and higher electricity bills. Balancing the blades ensures that they require minimal effort from the motor, improving energy efficiency.
- Prolonged lifespan: By balancing the blades, the fan's motor and bearings experience less stress, reducing wear and tear. This can prolong the lifespan of the fan, as a properly balanced fan will not put undue strain on its internal components.
- Enhanced air circulation: Balanced ceiling fan blades ensure that air is distributed evenly in all directions. An imbalanced fan may distribute air unevenly, resulting in areas with poor air circulation and others with excessive airflow. Balanced blades will maximize the fan's ability to generate a comfortable breeze throughout the room.
- Safety: An imbalanced ceiling fan can pose a safety risk if it starts to wobble vigorously. This can cause the fan to become loose or fall from the ceiling, potentially injuring individuals and causing damage to property. Balancing the blades minimizes the risk of these accidents, ensuring a safer environment.
Overall, balancing the ceiling fan blades is essential for optimal performance, energy efficiency, noise reduction, and longevity of the fan, while also enhancing comfort and safety in the room.