
Best Herb Harvesting Tools to Buy in July 2026
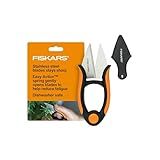
Fiskars Herb Garden Scissors, 5" Garden Shears, Handheld Herb Snips with Sheath and SoftGrip Handle, Dishwasher Safe
-
PRECISION CUTTING: SHARP STAINLESS STEEL BLADES FOR ACCURATE, EFFORTLESS CUTS.
-
ERGONOMIC DESIGN: SPRING-LOADED ACTION FOR REDUCED FATIGUE DURING USE.
-
DURABLE & EASY CARE: LONG-LASTING, DISHWASHER-SAFE BLADES ENSURE HYGIENE AND LONGEVITY.


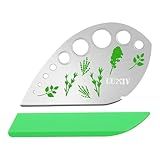
Herb Stripper 9 holes, Luxiv Stainless Steel Kitchen Herb Stripping Tool Loose Leaf Kale Razor Metal Leaf Pealer for Kale, Chard, Collard Greens, Thyme, Basil, Rosemary
- DURABLE DESIGN: FOOD-GRADE STAINLESS STEEL ENSURES LONG-LASTING USE.
- VERSATILE STRIPPING: 9 HOLE SIZES SUIT VARIOUS HERBS FOR ULTIMATE CONVENIENCE.
- 2-IN-1 FUNCTIONALITY: STRIPS AND CUTS LEAVES EFFICIENTLY FOR KITCHEN EASE.
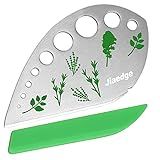
Herb Stripper, Jiaedge Green 9 holes Stainless Steel Kitchen Herbs Leaf Stripping Tool, Metal Herb Peeler for Kale, Collard Greens, Thyme, Basil, Rosemary Stripper
-
PREMIUM FOOD-GRADE STAINLESS STEEL FOR DURABILITY AND SAFETY.
-
9 VERSATILE HOLES FOR PERFECTLY STRIPPING ANY SIZE HERB.
-
DUAL FUNCTION: STRIPS, CUTS HERBS; PERFECT FOR KITCHEN OR GARDEN!
Barebones Herb Harvest and Strip Tool - Stainless Steel with Copper Accents - Your All-in-One Culinary Companion (Tumbled Steel)
- ALL-IN-ONE TOOL: HARVEST, STRIP, AND TRIM HERBS WITH PRECISION!
- DURABLE & SAFE: MADE FROM HIGH-QUALITY STAINLESS STEEL, BUILT TO LAST.
- ERGONOMIC DESIGN: COMFORTABLE GRIP FOR EASY, EFFICIENT HERB HANDLING!
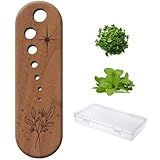
Herb Stripper Vegetable Leaf Herb Stripper Chopper Tool Handmade Wood 7 Hole Sizes Durable & Elegant Kitchen Tool with Storage Case Ideal Gift for Cooks - Black Walnut
-
HANDCRAFTED ELEGANCE: ARTISAN QUALITY ENHANCES KITCHEN AESTHETICS EFFORTLESSLY.
-
VERSATILE EFFICIENCY: STRIP HERBS QUICKLY WITH 7 HOLE SIZES FOR PERFECT PREP.
-
THOUGHTFUL GIFTING: A PRACTICAL GIFT FOR HOME COOKS AND FRESH HERB LOVERS.
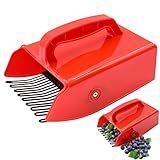
1 Pack Berry Picker, Berry Pickers and Rakes with Metallic Comb and Ergonomic Handle for Easier Berry Picking, Blueberry Rake Scoop for Blueberries, Lingonberries and Huckleberries
- ECO-FRIENDLY PICKER: COLLECT BERRIES GENTLY, NO CRUSHING OR MESS!
- LARGE CAPACITY: HOLDS 800-900 BERRIES FOR EFFICIENT HARVESTING.
- COMFORTABLE USE: ERGONOMIC DESIGN MINIMIZES HAND AND WRIST STRAIN.
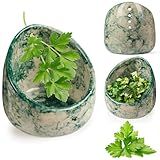
Pottery Herb Stripper Bowl, Handmade Ceramic Herb Peeling Bowl, for Separating Leaves and Stems (Green)
- EFFORTLESS LEAF PEELING: SAVE TIME WITH EASY, QUICK HERB PEELING.
- DURABLE CERAMIC DESIGN: HIGH-QUALITY MATERIAL ENSURES LONG-LASTING USE.
- VERSATILE KITCHEN TOOL: FUNCTIONS AS BOTH PEELER AND GRINDER FOR CONVENIENCE.
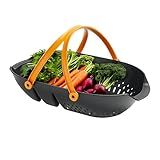
Fiskars Garden Harvest Basket - Container for Gardening and Harvesting with Tool Caddy - Harvesting Basket Doubles as a Colander for Vegetables and Fruits - Garden Accessories
- MULTI-FUNCTIONAL BASKET SIMPLIFIES HARVESTING AND TRANSPORTING PRODUCE.
- INNOVATIVE DESIGN WITH COLANDER AND ERGONOMIC HANDLES FOR EASE OF USE.
- DURABLE CONSTRUCTION ENSURES LONG-LASTING RELIABILITY AND EASY CLEANING.
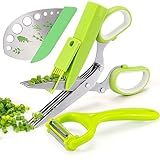
VlBlRlIT2025 Upgraded Herb Scissor,Leaf Stripper,Stainless Steel 5Blade Kitchen Scissors,Peelers for Kitchen,forChopping Chive,Vegetables,Salad,collard Greens,Parsley,Rosemary As Christmas gifts Green
-
VERSATILE 5-BLADE SCISSORS SIMPLIFY CUTTING, PEELING, AND CHOPPING!
-
ERGONOMIC ANTI-SLIP HANDLES ENSURE COMFORT AND SAFETY WHILE USING.
-
PERFECT GIFT FOR COOKING ENTHUSIASTS AND BEGINNERS ALIKE!
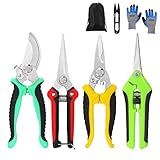
5‑Piece Garden Pruning Shears Set with Gloves & Storage Bag – Stainless Steel Trimming Scissors for Flowers, Herbs & Small Branches – Ergonomic Gardening Tools Kit (Multi-color)
-
🌿 ALL-IN-ONE KIT: 5 ESSENTIAL TOOLS FOR ALL YOUR GARDENING NEEDS!
-
🔪 SHARP & DURABLE: RUST-RESISTANT BLADES FOR EFFORTLESS, CLEAN CUTS.
-
🎁 PERFECT GIFT: IDEAL FOR ANY OCCASION; DELIGHT GARDEN LOVERS TODAY!
Harvesting and storing herbs from an indoor garden system can be a wonderful way to enjoy fresh flavors and fragrances all year round. Here are some steps to follow:
- Timing: Harvest herbs when they reach their peak. This is typically in the morning when their essential oils are most concentrated. Wait until the plants are well established and have several sets of leaves before harvesting.
- Washing: Gently rinse the herbs with cool water to remove any dust or debris. Be careful not to damage the delicate leaves or stems.
- Cutting: Use clean, sharp scissors or pruners to snip off the leafy stems just above a leaf node. This will encourage new growth to develop. Avoid cutting more than one-third of the plant at a time, as it may weaken the plant or impede its growth.
- Leaves: Detach the leaves from the stems if you only need them. Keep the leaves intact or chop them, depending on how you plan to use them. Ensure they are completely dry before storing.
- Stems: Herb stems can also be used, especially if you enjoy preparing herbal teas or infusions. Bundle the stems together and hang them upside down in a cool, dark, and well-ventilated area until they are completely dry.
- Storage containers: Choose airtight containers made of glass or metal, as they help preserve the flavor and aroma of the herbs. Avoid plastic containers, as they may not provide adequate protection.
- Labeling: When storing different herbs, label the containers with the name and date of harvest to ensure you use them before they lose their potency. This is particularly important if you have multiple herbs in your indoor garden.
- Storage conditions: Keep your stored herbs away from direct sunlight, heat sources, and moisture. Store them in a cool, dry place, like a pantry or cupboard.
Remember, each herb may have unique harvesting and storage requirements, so it's a good idea to research specific herbs to ensure you are following the best practices.
By following these guidelines, you can enjoy the bounty of your indoor herb garden throughout the year and savor the fresh flavors and scents even during colder seasons.
How to create a DIY self-watering system for herbs in an indoor garden?
Creating a DIY self-watering system for herbs in an indoor garden is a great way to ensure your herbs are well-watered, even if you're not available to water them regularly. Here's a step-by-step guide to creating such a system:
Materials you will need:
- A container or pot for your herb plants
- A second container or reservoir for holding water
- A water-absorbent wick or rope (cotton, nylon, or jute work well)
- A drill with a small drill bit (optional)
- Potting soil and herb plants
Step-by-step instructions:
- Select a suitable container for your herb plants. It should be deep enough to accommodate the plant's roots and have proper drainage holes at the bottom.
- Decide on the location of the water reservoir. This can be a separate container or the bottom of your main container. If using a separate container, ensure it has a watertight design.
- Determine the wick length based on the distance between the container and the water reservoir. Cut a piece of water-absorbent wick or rope that is long enough to reach from the herb's container to the water reservoir. Around 6-8 inches should work in most situations.
- If your containers do not have drainage holes, drill a few small holes in the bottom of the herb container for proper drainage. This will avoid drowning the plants.
- Place one end of the wick in the herb's container, pushing it into the potting soil. Make sure it is placed near the roots, as this is where the plant will absorb water.
- The other end of the wick should be placed in the water reservoir, ensuring it reaches the water. You can anchor the wick in place using a small weight or stone.
- Fill the herb's container with potting soil, leaving enough space for the roots of your plants. Plant your herb plants in the container, ensuring they are firmly rooted.
- Fill the water reservoir with water, such as a basin or a large dish. The water will be drawn up through the wick, providing a self-watering mechanism for your herbs.
- Monitor the water level in the reservoir regularly. Ensure it doesn't go dry, as this will disrupt the self-watering system. Refill the reservoir whenever the water level is low.
With this DIY self-watering system in place, you can enjoy healthy and well-nourished herb plants without the worry of constant watering. Just remember to periodically check the moisture level of the potting soil to make sure it's ideal for your herbs.
How to preserve herbs in oil for longer shelf life?
Preserving herbs in oil is a great way to extend their shelf life and add flavor to your dishes. However, it's important to note that if not done correctly, it can create an environment for botulism, a dangerous form of food poisoning. Here's a safe method to preserve herbs in oil:
- Use fresh, clean herbs: Start by selecting fresh herbs with no signs of mold, wilting, or discoloration. It's important to wash and dry them thoroughly to remove any dirt or bacteria.
- Sterilize your jars: It's crucial to prevent the growth of harmful bacteria, so make sure to sterilize the jars you'll be using for preservation. You can do this by boiling the jars and lids for 10 minutes or running them through a dishwasher cycle.
- Blanche the herbs: Blanching the herbs before preserving them helps to remove any excess water and reduce the risk of bacteria growth. Immerse the herbs in boiling water for about 10-15 seconds and then immediately transfer them to a bowl of ice water to cool.
- Dry the herbs: Once blanched and cooled, use a clean towel or paper towels to gently dry the herbs. Make sure to remove as much moisture as possible to prevent microbial growth.
- Add the herbs to the jars: Take your sterilized jars and layer them with the blanched and dried herbs. Consider tearing or chopping the herbs into small pieces to release more flavors, but avoid crushing them, as this can turn them bitter.
- Pour oil over herbs: Slowly pour your chosen oil, such as olive oil, into the jars, ensuring that the herbs are completely submerged. Make sure to leave about half an inch of headspace at the top of the jar to minimize contact with air.
- Remove air bubbles: Gently tap the jars on a countertop to remove any air bubbles that may be trapped in the oil. This helps to prevent oxidation and spoilage.
- Seal the jars: Wipe the jar rims with a clean, damp cloth to remove any oil or herb residue, then tightly seal the jars with sterilized lids.
- Store properly: Preserve the jars in the refrigerator to slow down microbial growth. Make sure to label them with the date of preparation and use them within several weeks. Remember, oil-infused herbs should not be stored at room temperature as it increases the risk of bacterial growth and botulism.
Following these steps will help you safely preserve and store your herbs in oil, ensuring a longer shelf life without compromising your health and safety.
What is the best way to store herbs in the refrigerator?
The best way to store herbs in the refrigerator is by following these steps:
- Trim the stems: Remove any excess leaves or damaged parts from the stems of the herbs.
- Place in water: Fill a glass or jar with about an inch or two of water. Place the herb stems in the water, similar to a bouquet of flowers.
- Cover the herbs: To keep the herbs moist, cover them loosely with a plastic bag. You can also use a ziplock bag or place an overturned plastic container on top to create a humid environment.
- Store in the refrigerator: Place the glass or jar with the herbs in the refrigerator. Make sure they are in an upright position to prevent any water from leaking. Most herbs can last anywhere from a few days up to two weeks when stored this way.
- Change water regularly: Check the water in the glass or jar every couple of days and change it if it becomes cloudy. This will help keep the herbs fresh and extend their shelf life.
Remember to check each herb's specific storage requirements, as some delicate herbs like basil are best stored at room temperature and not in the refrigerator.