Best Products to Buy to Fix Patio Glider Squeaks in July 2026
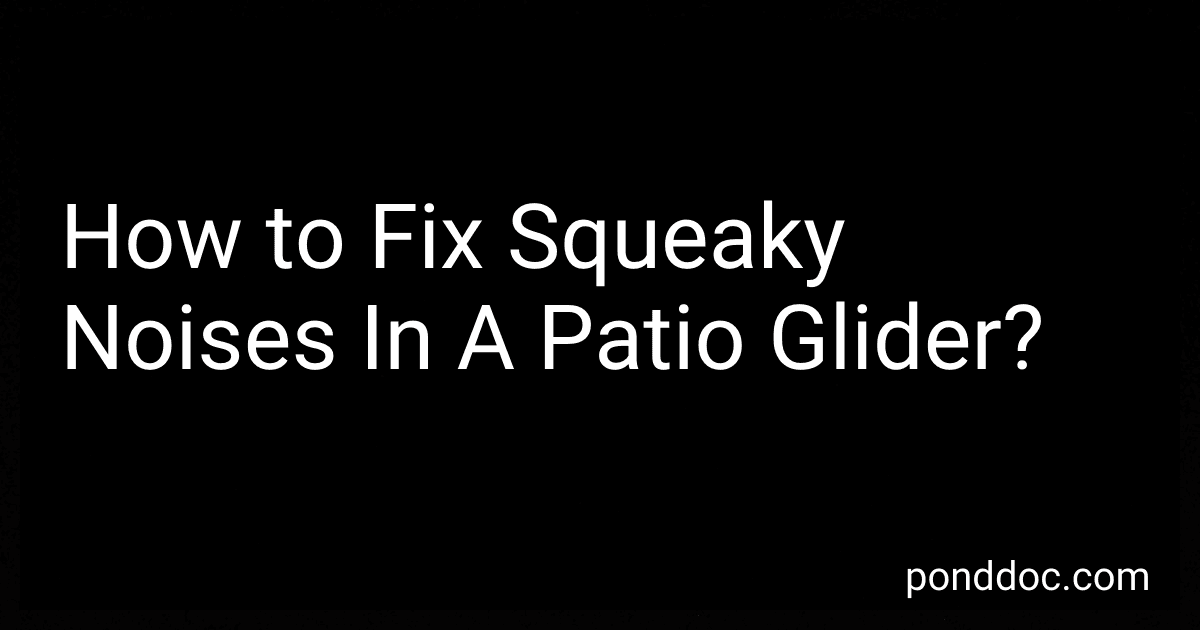
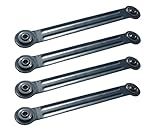
Patio Glider Replacement Bearing Bracket Rocker Arm Hardware Repair Kit for Outdoor and Indoor Furniture Adirondack Chair - 9" Length - 4 Pack
-
DURABLE STEEL WITH RUST-RESISTANT ZINC COATING FOR LONG-LASTING USE.
-
CUSTOMIZABLE COLOR-EASILY SPRAY PAINT TO MATCH YOUR FURNITURE!
-
COMPLETE REPAIR KIT FOR HASSLE-FREE INSTALLATION AND REPLACEMENT.


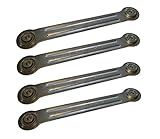
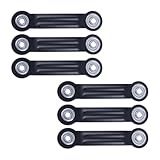
XYgdhqpt for Patio Porch Glider Straps Hanger Set Deck Restoration Part-16 Length 4PCS BLACk
-
PERFECT FIT: DESIGNED FOR 16” GLIDERS-EASY REPLACEMENT GUARANTEED!
-
COMPLETE SET: COMES WITH 4 METAL STRAPS AND ALL NECESSARY HARDWARE.
-
HASSLE-FREE SETUP: SIMPLE INSTALLATION WITH NO MODIFICATIONS NEEDED!
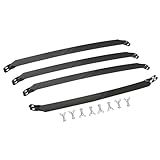
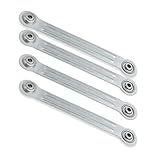
Project Patio Glider Bearing Arm Bracket Replacement Rocker Hardware Parts - 9 Inch Length - 7-1/2 Inch Between Mounting Holes - 4 Pack
- DIY-FRIENDLY KIT FOR EASY REPAIR OF GLIDERS AND VINTAGE FURNITURE.
- RUST-RESISTANT STEEL ENSURES LONG-LASTING PERFORMANCE IN ANY WEATHER.
- INCLUDES FOUR ARMS FOR QUICK UPDATES TO YOUR GLIDER OR ROCKING CHAIR.
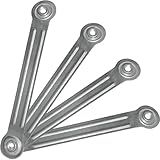
Patio Glider Replacement Bearing Bracket Rocker Arm Hardware Repair Kit for Outdoor and Indoor Furniture Adirondack Chair - 10" Length, 8 5/8" Hole to Hole - 4 Pack
-
DURABLE ZINC-COATED STEEL ENSURES RUST RESISTANCE AND LONGEVITY.
-
CUSTOMIZABLE COLOR: PAINT TO MATCH YOUR FURNITURE EFFORTLESSLY.
-
PERFECT FIT FOR ADIRONDACK CHAIRS; GREAT FOR OUTDOOR AND INDOOR USE!
LC LICTOP Glider Bearing Arm Bracket Replacement Hardware, 6.33 Inch Overall Length, 4.88 Inch Hole Center, Rocker Parts for Patio Glider, Garden Bench, and Chair Repair 6Pcs Black
-
PRECISION ALIGNMENT: ENSURES PERFECT FIT FOR OUTDOOR GLIDERS AND BENCHES.
-
SMOOTH PIVOTING: GROOVE BEARINGS PROVIDE SILENT MOTION AND DURABILITY.
-
UNIVERSAL FIT: ACCOMMODATES COMMON BOLTS FOR EASY RETROFITTING.
KOMORAX 4 PK Glider Bearing Arm 10" Length, 8 5/8" Hole to Hole Rocker Repair Parts Hardware Kit Replacement (10 Inches Long)
- DURABLE ZINC-COATED STEEL FOR LONG-LASTING PROTECTION.
- CUSTOMIZABLE: PAINT OVER ZINC FOR A PERSONALIZED FINISH.
- SECURE INSTALLATION WITH BOLTED HANGERS (BOLTS NOT INCLUDED).
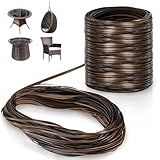
Covzoe 459Ft Wicker Repair Kit, Rattan Patio Chair Sofas Furniture Repair Supplies, Gradiant Coffe Brown Exlong Weaving Webbing Replacement Part for Outdoor Lawn Furniture
- EXTRA LONG LENGTH: 459FT MEETS ALL YOUR FURNITURE REPAIR NEEDS.
- DURABLE & FLEXIBLE: HIGH-QUALITY MATERIAL ENSURES LONG-LASTING USE.
- CUSTOMIZABLE DIY: SMOOTH SURFACE READY FOR YOUR CREATIVE TOUCH!
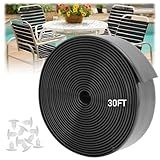
LukLoy 2" x 30' Vinyl Straps for Patio Chair Repair Kit + 30 Rivets, Cuttable Replacement Straps for Outdoor Garden Lawn Deck Pool Balcony Beach Furniture Chaise Lounge Repair, Black
-
REVAMP YOUR SPACE: RESTORE PATIO CHAIRS FOR A FRESH, STYLISH LOOK.
-
WEATHER-RESISTANT: OUR VINYL STRAPS RESIST FADING AND PEELING, ALL SEASON.
-
EASY DIY REPAIR: QUICK AND SIMPLE TOOL-FREE SETUP FOR ALL FURNITURE TYPES.
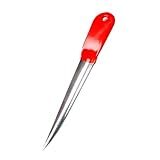
Wicker Repair Kit, Wicker Chair Rattan Repair Kit for Outdoor Patio Wicker Furniture, Wicker Weaving Tool Stainless Steel
- EFFORTLESSLY REPAIR WICKER FURNITURE WITH ERGONOMIC CURVED TIP DESIGN.
- DURABLE STAINLESS STEEL CONSTRUCTION ENSURES SAFE AND RELIABLE USE.
- COMFORTABLE SILICONE HANDLE FOR EASY, HASSLE-FREE WICKER REPAIRS.
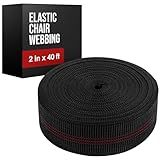
Houseables Chair Webbing, Upholstery Webbing, Replacement Straps for Lawn Chairs, Couch Elastic, Upholstery Strapping, Kit for Furniture Repair, Support, Sofa, Dining Seat, Belt, 2 Inch, 40 Foot Roll
-
40FT OF DURABLE WEBBING: PERFECT FOR DIY FURNITURE RESTORATION!
-
SUPPORTS MEDIUM-TO-HIGH TRAFFIC: IDEAL FOR CHAIRS, LOUNGES, AND MORE!
-
VERSATILE INDOOR/OUTDOOR USE: LONG-LASTING, WEATHER-RESISTANT QUALITY!
If your patio glider is producing squeaky noises, there are a few steps you can follow to fix the issue. First, you should locate the source of the noise. Inspect the glider for loose screws, bolts, or other hardware. Tighten any loose connections that you find using the appropriate tools.
Next, examine the moving parts of the glider. Apply a lubricant to areas that show signs of friction or wear. Silicone-based lubricants or dry lubricants are often recommended for outdoor furniture as they repel dirt and won't attract dust. Apply the lubricant generously to hinges, joints, and any other areas that move against each other.
If the squeak persists, check the glider's cushions or upholstery. It's possible that the noise is coming from these components rubbing against the frame. Realign the cushions or upholstery and ensure they are properly attached, making sure they are not causing any friction when the glider is in motion.
While fixing squeaky noises, take the opportunity to clean your patio glider. Remove any accumulated dirt, debris, or rust from the metal frame using a soft brush or cloth. Rinse the glider gently with water if needed, but make sure to dry it thoroughly afterward to prevent rust formation.
Finally, test your glider after performing these steps to see if the squeaky noise has been fixed. If the problem persists, you may want to consult a professional or consider replacing any particularly worn-out components to ensure smooth and quiet gliding.
How to repair rusted or corroded parts on a patio glider?
Repairing rusted or corroded parts on a patio glider may require some mechanical skills and the right tools. Here is a step-by-step guide to help you repair such parts:
- Gather the necessary tools and materials: Wire brush or steel wool Sandpaper or sanding block Rust converter or rust remover Rust-resistant paint or primer Screwdriver or wrench (if necessary) Lubricant (optional) Safety goggles and gloves
- Safety precautions: Ensure you are working in a well-ventilated area. Wear safety goggles and gloves to protect yourself from rust particles, chemicals, and sharp surfaces.
- Assess the damage: Inspect the entire glider to identify rusted or corroded parts. Determine if any parts need to be replaced instead of repaired.
- Remove rust: Use a wire brush or steel wool to remove loose rust from the affected area. If the rust is stubborn, sand the surface using sandpaper or a sanding block until you have reached bare metal. Ensure the surface is clean, dry, and free of any rust residue before proceeding.
- Apply rust converter: If there are areas where complete rust removal is not possible, apply a rust converter according to the manufacturer's instructions. The converter chemically converts any remaining rust and prevents further corrosion. Allow the converter to dry fully before proceeding.
- Apply primer or paint: Apply a rust-resistant primer to the affected areas and let it dry completely. If necessary or desired, you can apply multiple coats of primer, ensuring each coat is thoroughly dry before applying the next. After the primer has dried, you can paint the repaired parts with rust-resistant paint that matches the color of the glider. Apply as many coats as needed, allowing each coat to dry before applying the next.
- Reassemble and lubricate: Replace any parts that were removed during the repair process, using a screwdriver or wrench if necessary. Lubricate any movable parts, such as hinges or glider mechanisms, with an appropriate lubricant to ensure smooth operation.
- Regular maintenance: Regularly inspect and clean your patio glider to prevent rust or corrosion in the future. Apply a protective wax or coating to vulnerable areas to inhibit rust formation.
Remember, if the damage is severe or beyond your ability to repair, it may be best to seek professional help or consider replacing the parts or the entire glider.
How to fix squeaky noises in a patio glider?
To fix squeaky noises on a patio glider, follow these steps:
- Determine the source of the squeaking: Carefully examine the glider to identify where the noise is coming from. The most common areas include the gliding mechanism, the joints, or the metal or wood components rubbing against each other.
- Apply lubrication: Once you've identified the source, apply lubrication to that area. You can use various lubricants like WD-40, silicone spray, or a dry lubricant. Apply the lubricant generously, making sure to penetrate the joints and moving parts. Be cautious not to get any lubricant on the seat or cushions.
- Move the glider back and forth: With the lubricant applied, move the glider back and forth several times to distribute the lubrication and allow it to work into the joints and moving parts.
- Wipe away excess lubricant: After moving the glider, use a clean cloth or paper towel to wipe away any excess lubricant from the glider. This will prevent residue buildup and protect the surrounding area from getting stained or greasy.
- Check for loose screws or bolts: Loose screws or bolts can also contribute to squeaking noises. Carefully inspect the glider and tighten any loose screws or bolts you find using the appropriate tools.
- Apply a noise-damping material: If the squeaking persists or you want extra noise reduction, you can apply a noise-damping material to the problem areas. Felt pads or adhesive-backed rubber or foam strips can be attached to areas where metal or wood components rub together.
- Repeat if necessary: If the squeaking returns after some time, repeat the lubrication process, ensuring to apply more lubricant if needed.
Remember to regularly maintain and clean your patio glider to prevent future squeaking.
What is the purpose of suspension springs in a patio glider?
The purpose of suspension springs in a patio glider is to provide support, comfort, and a gentle rocking motion to the user. These springs help absorb shocks and reduce vibrations, making the glider more comfortable to sit on. They also allow the glider to move smoothly back and forth, creating a relaxing and rhythmic rocking experience.