
Best Dishwasher Leak Repair Kits to Buy in July 2026
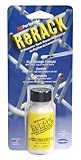
ReRack Dishwasher Rack Repair - White 630076
- TOUCH UP RUSTED RACKS TO PROTECT DISHES FROM RUST TRANSFER.
- DURABLE FORMULA WITHSTANDS HEAT AND PRESSURE FOR LASTING REPAIRS.
- VERSATILE BONDING FOR VARIOUS VINYL RACKS, ENHANCING THEIR LIFESPAN.


Avenuebool 1.7oz Dishwasher Rack Repair Coating, Grey Dishwasher Vinyl Rack Rust Touch Up Paint Kit, Insulation and Waterproof, High and Low Temperature Resistant
-
ALL-IN-ONE KIT: TOOLS FOR EASY, PRECISE DISHWASHER RACK REPAIRS!
-
SUPERIOR ADHESION: FAST-DRYING PAINT THAT RESISTS RUST AND CORROSION.
-
VERSATILE USE: REPAIR RACKS, CIRCUITS, AND MORE WITH ONE HANDY KIT!
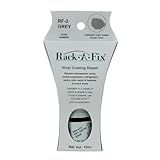
Fixture-Fix Rack-A-Fix Rf-3 Vinyl Dishwasher Rack Repair Coating & More, Appliance Touch-Up Paint, Grey
- RESTORE AND PROTECT RACKS WITH OUR DURABLE, EASY-TO-APPLY COATING.
- ACHIEVE A FACTORY-LIKE FINISH FOR APPLIANCES WITHOUT COSTLY REPLACEMENTS.
- QUICK-DRYING FORMULA ENSURES FAST APPLICATION AND RELIABLE RESULTS.
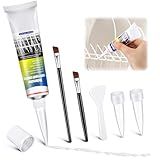
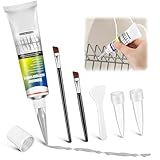
Avenuebool 1.7oz Dishwasher Rack Repair Coating, White Dishwasher Vinyl Rack Rust Touch Up Paint Kit, Insulation and Waterproof, High and Low Temperature Resistant
-
ALL-IN-ONE KIT: REPAIR YOUR DISHWASHER RACK WITH EASY-TO-USE TOOLS!
-
STRONG & DURABLE: ENJOY LONG-LASTING, FLEXIBLE, AND RESISTANT REPAIRS.
-
VERSATILE USE: PERFECT FOR DISHWASHER RACKS, WIRES, AND CIRCUIT REPAIRS!
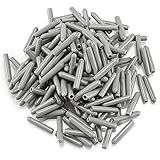
Cenipar Dishwasher Rack Tine Prong Repair End Cover Caps (100pcs) Anti Slip 1 inch Round Tips
- RESTORE DISH RACKS EASILY-100 CAPS PREVENT RUST AND SCRATCHES!
- DURABLE RUBBER WITHSTANDS HIGH HEAT; QUICK, NO-GLUE INSTALLATION!
- SAVE MONEY BY REPAIRING INSTEAD OF REPLACING YOUR DISHWASHER RACK!

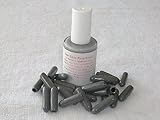
Light Grey Uber Goop Dishwasher Rack Coating/Glue w/25 caps …
- DURABLE SEAL: CREATES A STRONG, WATER AND HEAT-PROOF BOND.
- VERSATILE USE: WORKS ON ANY DISHWASHER MAKE OR MODEL.
- AWARD-WINNING QUALITY: RATED BEST OF THE BEST BY BESTREVIEWS.COM.
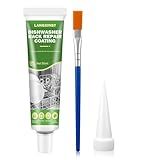
LANGXINST Dish Rack Repair Coating, Dish Rack Repair Kit Powerful waterproof protection, high/low temperature resistant formula Suitable for dishwasher and vinyl rack repair 50ml
- EASY APPLICATION: BRUSH OR NOZZLE FOR PRECISE, HASSLE-FREE REPAIRS.
- DURABLE PROTECTION: WATER-REPELLENT BARRIER EXTENDS DISHWASHER RACK LIFE.
- VERSATILE SOLUTION: WORKS ON MOST MAJOR BRANDS FOR EFFECTIVE REPAIRS.
Uber Goop Dark GREY Dishwasher Rack Coating/Glue w/25 caps by Uber Goop
- WATERPROOF, HEATPROOF, AND RUSTPROOF FOR LASTING PROTECTION.
- RATED BEST OF THE BEST BY BESTREVIEWS.COM FOR QUALITY ASSURANCE.
- WORKS WITH ANY DISHWASHER MODEL-VERSATILE AND EASY TO USE!

OverZyn Dishwasher Rack Repair Kit, Dishwasher Rack Repair Coating, Includes Ten Rubber Sleeves and a Brush; Heat Resistant; Suitable for Repairing dishwashers Baskets, White, 30ml
- RESTORE DAMAGED RACKS EASILY WITH OUR PRECISE REPAIR KIT.
- WATERPROOF AND INSULATED FOR SAFE USE IN HUMID ENVIRONMENTS.
- VERSATILE APPLICATIONS: REPAIRS RACKS, PLUGS, AND CIRCUIT BOARDS.
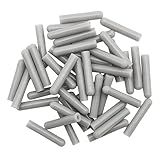
100 Pcs Universal Silicone Dishwasher Rack Tine Prong Repair End Tip Caps, Dishwasher Rack Tine Repair Kit, Round End Caps, Shelf Organizer Tip Cap Wire Thread Protector Cover, Anti Slip,1 inch, Gray
- UNIVERSAL FIT: WORKS WITH MOST DISHWASHERS-NO NEED FOR REPLACEMENT RACKS!
- DURABLE & SAFE: MADE OF FOOD-GRADE SILICONE, RESISTANT TO HIGH HEAT.
- QUICK INSTALLATION: JUST PUSH ON-NO GLUE NEEDED, RESTORES LIKE NEW!
To fix a leaky built-in dishwasher, you'll first need to turn off the power and water supply to the appliance. Then, check the door seal for any cracks or wear and tear, as this is a common source of leaks. If the door seal is damaged, it will need to be replaced.
Next, inspect the water inlet valve and hoses for any cracks or leaks. If you find any issues, they will need to be repaired or replaced. Additionally, check the dishwasher's drain hose for any clogs or kinks that may be causing water to leak out.
If you don't find any obvious issues with the door seal, water inlet valve, hoses, or drain hose, the problem may be with the dishwasher's pump or gasket. In this case, you may need to call a professional technician to diagnose and fix the issue.
Once you've made the necessary repairs, turn on the power and water supply to the dishwasher and run a cycle to check for any remaining leaks. If the issue persists, it's best to consult with a professional for further assistance.
What is the role of the float switch in preventing leaks in a built-in dishwasher?
The role of the float switch in preventing leaks in a built-in dishwasher is to detect when the water level in the dishwasher is too high. The float switch is a small device located in the bottom of the dishwasher that rises with the water level. When the water level reaches a certain point, the float switch activates a sensor that shuts off the water supply and prevents the dishwasher from overfilling, which could lead to leaks. This helps to protect the dishwasher and surrounding cabinets from water damage caused by leaks.
How to fix a leaky inlet valve in a built-in dishwasher?
- Turn off the power to the dishwasher by unplugging it or turning off the circuit breaker.
- Remove the lower front panel of the dishwasher to access the inlet valve.
- Locate the inlet valve, which is usually located at the bottom of the dishwasher near the water supply line.
- Check the inlet valve for any visible signs of damage, such as cracks or leaks. If you see any damage, the valve will need to be replaced.
- If the valve appears to be in good condition, try tightening the connections of the water supply line to the valve and the valve to the dishwasher. Use a pair of pliers to securely tighten the connections.
- Turn the power back on and run a cycle to see if the leak has been resolved. If the leak persists, you may need to replace the inlet valve.
- To replace the inlet valve, disconnect the water supply line and electrical connections from the old valve and remove it from the dishwasher. Install the new valve in the same location and reconnect the water supply line and electrical connections.
- Test the dishwasher again to ensure that the leak has been fixed. If the issue persists, you may need to seek professional help or consider replacing the dishwasher.
What is the significance of maintaining proper water pressure to prevent leaks in a built-in dishwasher?
Maintaining proper water pressure in a built-in dishwasher is essential for preventing leaks for several reasons:
- Damage prevention: If the water pressure is too high, it can cause the dishwasher components to become overloaded and potentially leak. This can lead to water damage to surrounding cabinets, flooring, and other fixtures in the kitchen.
- Efficiency: Proper water pressure ensures that the dishwasher operates efficiently and effectively, without the risk of leaks or malfunction.
- Longevity: Consistently high water pressure can put unnecessary stress on the dishwasher's components, leading to premature wear and tear. Maintaining proper water pressure can help extend the lifespan of the appliance.
- Safety: Leaks from a dishwasher can create a hazard in the kitchen, causing slippery surfaces and potential electrical hazards if the water comes into contact with wiring or outlets.
Overall, maintaining proper water pressure in a built-in dishwasher is crucial for preventing leaks, ensuring the appliance operates efficiently, and avoiding costly water damage repairs.
What is the best way to address leaks caused by a malfunctioning water inlet valve in a built-in dishwasher?
The best way to address leaks caused by a malfunctioning water inlet valve in a built-in dishwasher is to follow these steps:
- Turn off the water supply to the dishwasher by locating the shut-off valve connected to the water inlet pipe.
- Disconnect the power supply to the dishwasher by unplugging it or turning off the circuit breaker.
- Remove the bottom panel of the dishwasher to access the water inlet valve. Take precautionary measures to prevent any damage to the dishwasher or injury to yourself.
- Inspect the water inlet valve for any visible signs of damage or malfunction, such as cracks, leaks, or mineral deposits. If the valve is faulty, it will need to be replaced.
- Purchase a new water inlet valve compatible with your dishwasher model. You can find replacement valves at hardware stores or online retailers.
- Install the new water inlet valve by following the manufacturer's instructions. Make sure to tighten all connections securely.
- Turn on the water supply and power to the dishwasher and run a test cycle to check for leaks. Monitor the dishwasher during operation to ensure that the leak has been resolved.
- If the leak persists, or if you are uncomfortable with performing the repairs yourself, it is recommended to contact a professional appliance repair service for assistance.
How to replace a faulty door seal to fix a leak in a built-in dishwasher?
To replace a faulty door seal in a built-in dishwasher, you will need a new door seal (which you can purchase from the manufacturer or a hardware store), a screwdriver, and possibly a putty knife. Here is a step-by-step guide to help you replace the door seal and fix the leak:
- Start by disconnecting the power to the dishwasher by unplugging it or turning off the circuit breaker.
- Open the dishwasher door and locate the existing door seal along the inner edge of the door. Remove the old seal by peeling it away from the door frame. You may need to use a putty knife to help loosen and remove the seal.
- Clean the area where the old door seal was attached using a damp cloth to remove any debris or residue.
- Take the new door seal and align it along the inner edge of the door frame. Make sure the seal is properly positioned and sits flush against the door frame.
- Once the new seal is in place, use a screwdriver to secure it by attaching any clips or screws that hold it in place.
- Close the dishwasher door and check for any gaps or gaps in the seal. If needed, adjust the seal to ensure it provides a tight and secure fit.
- Turn the power back on to the dishwasher and run a test cycle to check for any leaks. If the door seal is properly installed, the leak should be fixed.
If you are unsure about how to replace the door seal or if you encounter any difficulties during the process, it may be best to consult a professional technician for assistance.