
Best Air Mattress Repair Kits to Buy in July 2026
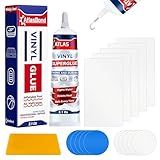
Air Mattress Patch Kit, Heavy Duty Inflatable Patch Repair Kit, Safe, Gentle, and All-in-One Vinyl PVC Glue for Blow Up Bed, Above Pool, Underwater Liners, Bounce House, Hot Tub and More
-
STRONG, LONG-LASTING SEAL FOR ALL AIR MATTRESSES ENSURE YOUR AIR BED STAYS FIRM AND LEAK-FREE WITH OUR PATCH KIT.
-
WATERPROOF & HEAT-RESISTANT FOR DURABLE REPAIRS PATCHES THAT WON’T PEEL OR COME LOOSE, EVEN IN EXTREME CONDITIONS.
-
VERSATILE FOR ALL INFLATABLE REPAIRS WORKS ON PVC, VINYL, NYLON, AND MORE-IDEAL FOR ANY INFLATABLE!


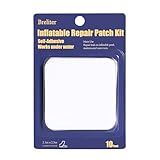
Breliter Inflatable Patch Repair Kit - Waterproof TPU Pool Repair Tape, Heavy Duty Repair Patch for Air Mattress, Bounce House, Inflatable Toys, Tent, Swimming Ring - 10 Packs of 2.5in x 2.5in, Square
- SAVE TIME AND MONEY WITH STRONG, WATERPROOF REPAIRS ON INFLATABLES!
- PREMIUM TPU MATERIAL ENSURES DURABILITY AND LONG-LASTING ADHESION.
- EASY APPLICATION: JUST CLEAN, STICK, AND PRESS FOR INSTANT RESULTS!
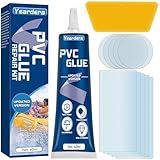
Yeardera Air Mattress Patch Kit, Waterproof Vinyl Repair Kit, High Strength PVC Adhesive for Inflatables, PVC Boats, Vinyl Glue (60ml/1 Pack)
-
SEAMLESS REPAIRS: EASILY MEND TEARS AND HOLES WITH STRONG, WATERPROOF PATCHES.
-
VERSATILE USE: PERFECT FOR INFLATABLES, POOLS, AND VARIOUS PVC SURFACES.
-
USER-FRIENDLY: SIMPLE APPLICATION WITH NO PROFESSIONAL SKILLS NEEDED.
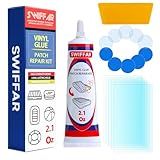
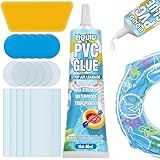
Air Mattress Patch Kit, Heavy Duty Underwater Pool Liner Patch Kit, Effective Vinyl Glue for Above Ground Pool, Paddle Board, Float, PVC Boat, Raft, Air Bed, Bounce House, Hot Tub, Gentle Formula
-
SEAMLESS REPAIRS: FIX LEAKS IN ANY INFLATABLE QUICKLY AND EFFECTIVELY.
-
STRONG ADHESION: STICKS SECURELY, ENSURING A LONG-LASTING, WATERPROOF SEAL.
-
USER-FRIENDLY: EFFORTLESS APPLICATION MEANS ANYONE CAN MAKE RELIABLE REPAIRS.
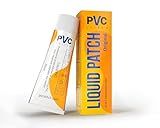
PVC Stitch Liquid Patch – Air Mattress Patch Kit Heavy Duty, Inflatable Patch Glue for PVC & PU, Inflatable Boats, Rafts, Kayaks, SUP, Hot Tubs, Waterbeds, Bounce Houses. Waterproof, 3-hr Cure, 20 ml
-
PERMANENT, STRONG SEAL-HANDLES PRESSURE OVER 50 PSI!
-
FAST APPLICATION: READY TO USE IN 2 HOURS, MAX STRENGTH IN 6!
-
UNIVERSAL COMPATIBILITY: PERFECT FOR ALL PVC AND PU GEAR!
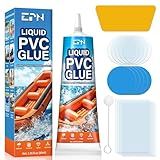
EPN Air Mattress Patch Kit, Waterproof Vinyl Pool Liner Repair Kit for Inflatables, Air Mattress, Swimming Ring, Tent, Bounce House, Inflatable Toys, Hot Tub, PVC Boat, Raft, Kayak (80 ML)
-
AIRTIGHT REPAIRS: RELIABLE FIXES FOR PUNCTURES AND TEARS USING STRONG VINYL.
-
VERSATILE COMPATIBILITY: WORKS ON PVC, RUBBER, AND MORE-PERFECT FOR ALL INFLATABLES!
-
SIMPLE APPLICATION: EASY-TO-FOLLOW STEPS FOR QUICK, EFFECTIVE REPAIRS AT HOME.
Air Mattress Patch Kit, Pool Patch Repair Kit, Waterproof & High Strength Vinyl PVC Glue for Inflatable Toys, Hot Tub, PVC Boat, Tent, Bounce House (60 ML)
- DURABLE REPAIRS: STRONG VINYL ADHESIVE FORMS LASTING, AIRTIGHT BONDS.
- WATERPROOF & UV RESISTANT: IDEAL FOR POOLS; PREVENTS YELLOWING OVER TIME.
- VERSATILE USE: REPAIR VARIOUS INFLATABLES-FROM MATTRESSES TO KAYAKS.
To fix a hole in an air mattress, first locate the hole by inflating the mattress and listening for any hissing sounds or feeling for escaping air. Once the hole is located, use a patch kit specifically designed for repairing air mattresses. Clean and dry the area around the hole, then apply the adhesive patch over the hole, making sure it is firmly pressed down to create a secure seal. Allow the adhesive to dry completely before re-inflating the mattress to ensure the patch holds. If the hole is too large or the patch kit doesn't work, consider using a bicycle tire patch or contacting the manufacturer for repair options.
How to fix a hole in an air mattress using a patch kit?
Here are steps to fix a hole in an air mattress using a patch kit:
- Locate the hole in the air mattress by inflating it and listening for any hissing sounds. You can also run a wet cloth or sponge over the surface of the mattress and look for bubbles forming around the area of the hole.
- Once you have found the hole, deflate the mattress completely and clean the area around the hole with soapy water to remove any dirt or debris. Let the area dry completely before proceeding.
- Cut a patch from the repair kit that is large enough to cover the hole with at least a half-inch margin around it.
- Apply a thin layer of the adhesive included in the patch kit to both the patch and the area around the hole on the mattress. Let the adhesive sit and dry for a few minutes until it becomes tacky.
- Place the patch over the hole and press down firmly to ensure a strong bond between the patch and the mattress. Smooth out any air bubbles or wrinkles in the patch.
- Let the patch dry completely according to the instructions on the adhesive package before inflating the mattress again.
- Once the patch has fully dried, inflate the mattress and check for any leaks. If the patch holds and there are no more hissing sounds, your air mattress should be ready to use again.
What is the proper way to clean an air mattress before patching?
- Deflate the air mattress completely and remove any bedding or covers.
- Wipe down the surface of the air mattress with a damp cloth to remove any dirt, dust, or debris. Be sure to pay attention to seams and crevices where leaks may occur.
- Once the surface is clean, mix a solution of mild soap and water in a spray bottle. Spray the solution onto the surface of the air mattress and use a soft-bristled brush to gently scrub away any remaining dirt or stains.
- Rinse the surface of the air mattress with a clean, damp cloth to remove any soap residue.
- Allow the air mattress to dry completely before patching any leaks. This may take several hours, depending on the size of the mattress and the humidity level in the room.
- Once the air mattress is dry, locate the source of the leak by inflating the mattress and listening for the sound of escaping air or by applying a solution of soapy water to the surface and watching for bubbles.
- Patch the leak using a repair kit specifically designed for air mattresses, following the manufacturer's instructions carefully.
- Once the patch is in place, allow it to dry completely before re-inflating the air mattress and using it again.
What is the best adhesive for fixing an air mattress?
The best adhesive for fixing an air mattress is a vinyl repair kit specifically designed for inflatables. These kits usually contain a strong adhesive that is designed to bond well with the vinyl material of an air mattress. It is important to make sure that the adhesive is compatible with the material of the air mattress to ensure a secure and long-lasting repair. Other options include super glue or a vinyl repair patch, but a vinyl repair kit is typically the most reliable choice for fixing an air mattress.