
Best Fire Pit Conversion Kits to Buy in July 2026
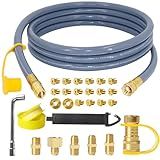
5369 Propane to Natural Gas Conversion Kit, 12FT 3/8" ID Natural Gas Hose with Quick Connect for weber, char-broil, blackstone, Pizza Oven(Only Applicable to Devices with 3/8" ID)
- VERSATILE COMPATIBILITY: WORKS WITH POPULAR GRILLS, HEATERS, AND MORE!
- ENHANCED SAFETY FEATURES: MADE FROM DURABLE BRASS AND UPGRADED RUBBER.
- COST-EFFICIENT: ELIMINATES NEED FOR PROPANE TANKS, SAVING YOU MONEY.


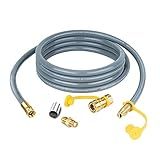
Skyflame 12 Feet Natural Gas Conversion Kit, Propane to Natural Gas Hose with Quick Connect Fitting, Fitting for Grill, Generator, Fire Pit, Patio Heater and More NG Appliance - 40K BTU
-
HIGH CONVERSION EFFICIENCY: CONVERTS PROPANE TO NATURAL GAS UP TO 40K BTU.
-
ROBUST SAFETY DESIGN: DURABLE BRASS FITTINGS ENSURE NO LEAKS OR WEAR.
-
VERSATILE COMPATIBILITY: PERFECT FOR GRILLS, FIRE PITS, AND MORE APPLIANCES.
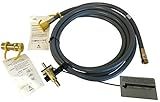
Outland Firebowl Natural Gas Conversion Kits for Specified Models of Portable Propane Fire Pits, Complete 3 Piece Set - CSA Certified for Quick & Easy Conversion (783 NGCK Manual for FMPPC2B-885 Mega)
-
DESIGNED FOR OUTLAND FIREBOWL MEGA 885: PERFECT FIT GUARANTEE!
-
CSA CERTIFIED FOR SAFETY: PEACE OF MIND WITH EVERY USE!
-
QUICK CONVERSION: INSTALL IN UNDER 30 MINUTES WITH EASE!
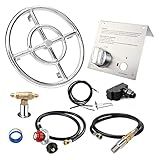
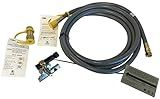
Uniflasy 12" Fire Pit Ring Burner Kit, Stainless Steel Propane Gas Firepit Ring Kit with Spark Ignition, Control Knob and Propane Hose Installation Kit for Indoor&Outdoor Fireplaces DIY Burner Kit
- EASY DIY INSTALLATION: CONNECT TO GAS, ADD GLASS, AND ENJOY!
- VERSATILE INDOOR/OUTDOOR USE FOR AMBIANCE AND STYLE.
- DURABLE STAINLESS STEEL DESIGN ENSURES LONG-LASTING PERFORMANCE.
Outland Natural Gas Conversion Kits for Auto-Ignition Propane Fire Pit Tables, Complete 3 Piece Set – CSA Certified for Quick & Easy Conversion (787 NGCK for FMPPC2E & FMPPC2E-1 Series 401 Tables)
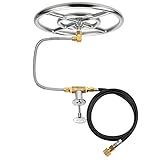
Stanbroil Natural Gas Fire Pit Stainless Steel Burner Ring Installation Kit, 12-inch
-
DURABLE 304# STAINLESS STEEL FOR LONG-LASTING PERFORMANCE!
-
STYLISH CROSS-BAR DESIGN ENHANCES GAS FLOW AND AESTHETICS!
-
COMPLETE SETUP: INCLUDES EVERYTHING FOR HASSLE-FREE INSTALLATION!
Converting a wood-burning fire pit to gas can be a great option if you prefer the convenience and cleanliness of a gas-powered fire. While the process may seem challenging, it can be relatively straightforward with the right materials and proper safety precautions. Here is a step-by-step guide on how to convert a wood-burning fire pit to gas:
- Assess the fire pit: Before starting the conversion, evaluate the condition and design of your existing fire pit. Ensure that it is suitable for a gas conversion and will allow for proper ventilation of the gas.
- Gather necessary supplies: To convert your fire pit to gas, you will need some essential supplies, including a gas burner ring or a fire pit kit, a gas supply line, a burner pan, a regulator, and a propane or natural gas source.
- Safety first: It is crucial to prioritize safety during the conversion process. Make sure to turn off the gas supply, disconnect any propane tanks or sources, and allow sufficient time for the wood-burning fire pit to cool down completely before proceeding.
- Remove or modify existing components: Depending on the design of your wood-burning fire pit, you may need to remove certain elements, such as grates or logs. Some fire pits may require modification of the existing structure to accommodate the gas burner system.
- Install the burner and pan: Place the burner pan at the center of the fire pit and attach the gas burner ring to it. Ensure that the burner ring is level for even gas distribution and optimal flame appearance. Follow the manufacturer's instructions or refer to the fire pit kit for specific guidance on installation.
- Connect the gas supply line: Securely attach the gas supply line to the burner pan using appropriate fittings and connectors. If you are unsure about the correct connections, consult a professional or a licensed plumber for assistance. Remember to use a leak-detection solution to check for any gas leaks once the connections are made.
- Install a regulator: Depending on the gas source and pressure, you may need to install a regulator in-line between the gas supply source and the fire pit. The regulator will ensure the gas pressure is within the appropriate range for safe and efficient operation.
- Test and adjust: Once the conversion is complete, test the fire pit by turning on the gas supply and igniting the burner. Check for proper flame height and adjust the gas flow using the regulator if necessary. Make sure there are no gas leaks and that the flame is steady and controlled.
- Enjoy your gas fire pit: Once you have confirmed that everything is working correctly, you can now enjoy your converted gas fire pit. Remember to always follow safety guidelines, such as monitoring the fire and ensuring proper ventilation, when using your gas fire pit.
Keep in mind that specific instructions may vary depending on the type and brand of fire pit or burner kit you choose, so always refer to the provided manufacturer's instructions for the most accurate guidance. Additionally, if you are unsure about any aspect of the conversion process, it is always recommended to consult a professional or licensed technician for assistance to ensure a safe and reliable installation.
How to control the gas flow in a converted fire pit?
Controlling gas flow in a converted fire pit typically involves adjusting the gas valve, which is usually located near the main gas supply or on the fire pit itself. Here are the steps to control the gas flow:
- Locate the gas valve: Look for a valve either on the fire pit or on the gas supply line leading to the fire pit. It is usually a wheel or lever-like valve.
- Turn off the gas: If the gas is currently flowing, turn off the gas valve by turning the wheel or lever clockwise until it is fully closed.
- Adjust the gas flow: Slowly turn the gas valve counterclockwise to open it and allow the gas to flow. Start with a low flow rate to prevent too much gas from entering the fire pit at once.
- Test the gas flow: Light the fire pit and observe the flame. If the flame is too high or too low, continue adjusting the gas flow to achieve the desired flame height.
- Use gas flow control devices (optional): Some fire pits may have additional gas flow control devices such as gas flow regulators or control knobs. Refer to the manufacturer's instructions for specific details on using these devices to control the gas flow.
It is important to exercise caution and follow safety guidelines when working with gas. If you are unsure about how to control the gas flow in your particular fire pit, consult the manufacturer's instructions or consider seeking the assistance of a professional.
How do I switch from wood to gas in a fire pit?
To switch from a wood-burning fire pit to a gas fire pit, you would need to follow these steps:
- Determine if your fire pit is compatible: Confirm if your fire pit is designed to be converted from wood-burning to gas. Some fire pits are specifically built as wood-burning only and may not have provisions for a gas conversion.
- Check local codes and regulations: Before making any changes, ensure that converting to a gas fire pit is permitted by local rules and regulations. Some areas have restrictions on gas fire pit installations.
- Purchase a gas burner kit: To convert your fire pit, you will need a gas burner kit. These kits typically include components such as a gas burner, control valve, gas line, and igniter. Ensure you choose a kit suitable for your fire pit size and design.
- Prepare the fire pit: Remove any existing wood, ash, or debris from the fire pit. Clean the area thoroughly and ensure it is clear of any flammable materials.
- Install the gas burner kit: Follow the instructions provided with your gas burner kit to install the components safely. This typically involves attaching the gas line to the burner, connecting the control valve to a gas source, and anchoring the burner and valve securely within the fire pit. Make sure to tightly seal all connections to prevent gas leaks.
- Connect to a gas supply: Consult with a licensed professional if you are not experienced in working with gas lines or connections. A qualified individual can help install a gas line and connect your fire pit to a suitable gas supply. Adhere to all safety guidelines and codes during this step.
- Test the system: Once the installation is complete, test the gas fire pit to ensure it is working correctly. Check for any gas leaks by applying a soapy water solution to all connections and watching for bubbles. If you detect a leak, immediately shut off the gas supply and rectify the issue before proceeding.
- Enjoy the gas fire pit: Once you are confident in the system's safety and functionality, you can begin enjoying your gas fire pit. Remember to always follow safety precautions, including extinguishing the flames when not in use and keeping flammable materials away from the pit.
It is essential to prioritize safety during the conversion process. If you are uncertain about any aspect of the conversion, consult with a professional or qualified technician for guidance.
What tools do I need to convert a fire pit to gas?
To convert a fire pit to gas, you will need the following tools:
- Propane or natural gas conversion kit: This includes the necessary components such as a gas burner, control valve, gas hose, regulator, and ignition system specific to your fire pit.
- Wrenches and screwdrivers: These basic hand tools will be needed to disassemble and reassemble some parts of the fire pit.
- Pipe thread sealant: It is recommended to use a pipe thread sealant to ensure proper sealing and prevent gas leaks. You can choose between thread-sealing tape or pipe joint compound.
- Pipe cutter or hacksaw: If you need to cut and modify any existing gas pipes, you will require a pipe cutter or hacksaw to make accurate cuts.
- Safety goggles and gloves: It is essential to prioritize safety during the conversion process, so wearing goggles and gloves will protect you from any potential harm.
- Tape measure: A tape measure may be required to take precise measurements for proper installation and positioning of the gas components.
- Assorted fittings and adapters: Depending on your particular fire pit and gas connections, you might need additional fittings and adapters to connect the gas components properly.
It is recommended to consult the instruction manual provided with your conversion kit, as there may be specific tools or requirements mentioned by the manufacturer. Additionally, if you are unsure about any aspect of the conversion process, it is wise to consult a professional gas technician to ensure a safe and proper conversion.
How to convert a wood-burning fire pit to a gas fire pit table?
Converting a wood-burning fire pit to a gas fire pit table requires some work and knowledge of gas plumbing. Here are the general steps you can follow:
- Gather the necessary materials: You will need a gas fire pit table kit, which typically includes a burner, gas valve, gas line, and other required components. Additionally, you will need a propane tank or a natural gas source, depending on your preferences and availability.
- Prepare the existing fire pit: Remove all wood, ashes, and debris from the fire pit. Clean and inspect the pit to ensure it is in good condition and suitable for conversion.
- Install the gas burner: Follow the manufacturer's instructions to install the gas burner in the fire pit. This typically involves placing the burner pan in the center of the pit and attaching the burner nozzle to the gas line.
- Connect the gas line: If using propane, connect the gas line from the burner to the propane tank. Ensure all connections are secure by using a wrench to tighten them. If using a natural gas source, consult a professional for proper installation.
- Install the gas valve: Attach the gas valve to the gas line between the burner and the propane tank (or natural gas source). The gas valve allows you to control and adjust the gas flow to the burner.
- Test for gas leaks: Before igniting the fire pit, test for any gas leaks. Apply a mixture of soapy water to all gas connections and joints. If you observe bubbles forming, it indicates a leak. In such cases, tighten the connections or consult a professional to fix the issue.
- Finalize the setup: Once you have ensured there are no gas leaks, place fire-resistant glass or lava rocks over the burner to create a desired aesthetic. You may also consider adding a flame guard or wind guard for added safety and convenience.
- Ignite the gas fire pit: After completing the setup, carefully open the gas valve and ignite the fire pit according to the manufacturer's instructions. Make sure to follow all safety precautions and guidelines.
Note: It is essential to follow all safety measures and consult professionals if you are unsure about any step in the process.
How to adjust the flame on a gas fire pit?
To adjust the flame on a gas fire pit, follow these steps:
- Familiarize yourself with the controls: Locate the control valve on the gas fire pit. You'll typically find it near the gas source or on the side of the fire pit.
- Start the fire pit: Ignite the fire pit using the designated method provided by the manufacturer. Some fire pits have electronic ignition systems, while others require a lighter or match.
- Locate the control knob: Identify the control knob attached to the control valve. It is usually a round or square-shaped knob.
- Turn off the fire pit: If the fire pit is already running, turn off the flame completely by turning the control knob counterclockwise until it stops. This ensures a fresh start for adjusting the flame.
- Access the control valve: Remove any covers or safety caps from the gas control valve. Check the manufacturer's instructions for guidelines on removing these and accessing the valve.
- Adjust the air-to-gas ratio: Locate the air shutter or air venturi adjustment on the control valve. This allows you to adjust the air-to-gas mixture for optimum combustion. Open the air shutter or venturi to increase the flame height or close it slightly to decrease the flame height. Make small adjustments and test the flame after each adjustment.
- Adjust the gas flow: Turn the control knob clockwise to increase the gas flow or counterclockwise to decrease it. Make small adjustments and test the flame after each adjustment.
- Continue testing until satisfied: After each adjustment, ignite the fire pit and let it burn for a few minutes to observe the flame height and appearance. Repeat the process until you achieve the desired flame height and appearance.
- Safety precautions: Ensure that you always follow the manufacturer's instructions to use the fire pit safely. If you are unsure about adjusting the flame, consult a professional technician or contact the fire pit's manufacturer for assistance.
Remember to exercise caution when dealing with fire and gas appliances, and always prioritize safety.