Best Outdoor Patio Glider Maintenance Products to Buy in July 2026
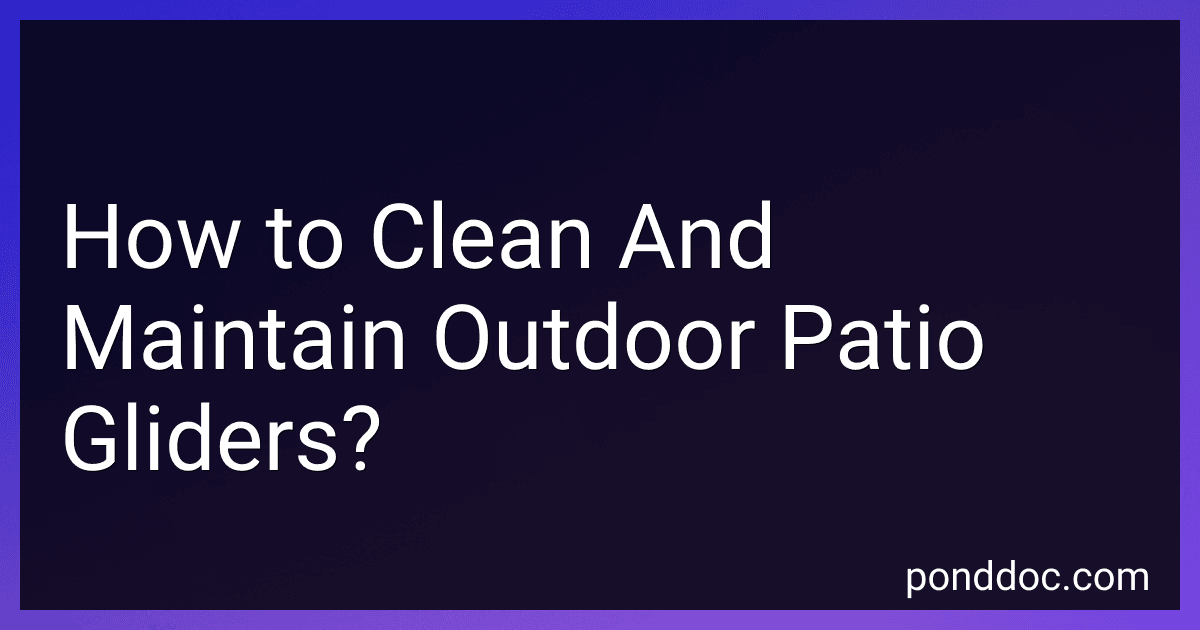
LC LICTOP Glider Bearing Arm Bracket Replacement Hardware, 6.33 Inch Overall Length, 4.88 Inch Hole Center, Rocker Parts for Patio Glider, Garden Bench, and Chair Repair 6Pcs Black
- EASY INSTALLATION: 4.88 HOLE SPACING FITS MOST OUTDOOR GLIDER FRAMES.
- SMOOTH OPERATION: GROOVE BALL BEARINGS ENSURE QUIET, LONG-LASTING PIVOTING.
- DURABLE AND VERSATILE: WEATHER-RESISTANT COATING PROTECTS AGAINST CORROSION.


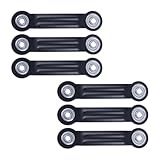
Fortune Candy Patio Glider with Cup Holders, High Roll Back and Deep Contoured Seat, Heavy Duty 800 Lb (Brown, 2-Seater)
- WEATHERPROOF DURABILITY: 3-LAYER PU FINISH PROTECTS AGAINST ELEMENTS.
- SUPERIOR STRENGTH: SUPPORTS UP TO 800 LBS WITH THICK, STURDY FIR WOOD.
- ERGONOMIC COMFORT: CONTOURED DESIGN ENSURES ULTIMATE SUPPORT AND RELAXATION.
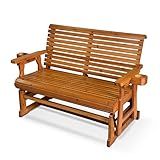
wildformers Luxury Outdoor Swivel Wicker Glider Patio Chairs with Table Set, Overstuffed Washable Cushions, Ideal for Porch, Balcony, Deck, Grey Rattan and Blue Cushion
- DURABLE OUTDOOR DESIGN: UV-RESISTANT WICKER & STEEL FRAME FOR LONGEVITY.
- SAFE 360 SWIVEL GLIDER: STABLE BASE ENSURES A SMOOTH, SAFE ROCKING EXPERIENCE.
- EASY CARE CUSHIONS: WASHABLE, THICK FOAM CUSHIONS FOR LONG-LASTING COMFORT.
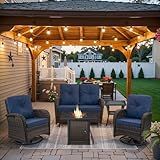
Belord 5 Pieces Patio Furniture Set with 30” Propane Fire Pit Table, Deep Seating Swivel Rocker Glider Outdoor Chairs Set of 4 with Side Table Set of 2 Patio Conversation Set Brown Wicker
-
ULTIMATE COMFORT: ENJOY RELAXING ROCKING CHAIRS WITH SUPPORTIVE CUSHIONS.
-
VERSATILE FIRE PIT: STYLISH TABLE DOUBLES AS A 50,000 BTU FIRE PIT.
-
DURABLE DESIGN: BUILT WITH WEATHER-RESISTANT MATERIALS FOR LASTING USE.
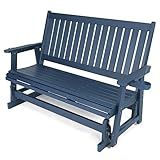
HIPS Patio Glider with Cup Holders, Durable Poly Lumber Material, All-Weather Resistant, High Backrest and Deep Contoured Seat, Heavy Duty 900 LB, for Outdoor, Porch, Patio (Navy Blue, 3-Seat)
-
DURABLE HIPS MATERIAL: WEATHER-RESISTANT, LONGER-LASTING THAN WOOD.
-
ERGONOMIC COMFORT: DESIGNED FOR ULTIMATE RELAXATION WITH DEEP SEATING.
-
ECO-FRIENDLY STYLE: BEAUTIFUL WOOD GRAIN FINISH, BETTER THAN HDPE.
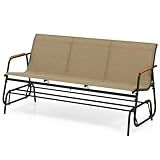
LDAILY Outdoor Glider, 2/3-Person Gliding Bench with Heavy-Duty Metal Frame & Teak Wood Armrests, Breathable Quick-Dry Fabric, 42.5"L x 45"W x 33"H Patio Glider for Poolside, Garden (29”x66.5”x33”)
- SMOOTH GLIDING MOTION FOR ULTIMATE RELAXATION ANYWHERE!
- ERGONOMIC DESIGN: COMFORT THAT ENCOURAGES EXTENDED LOUNGING!
- DURABLE, BREATHABLE FABRIC FOR YEAR-ROUND OUTDOOR ENJOYMENT!
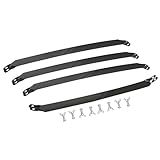
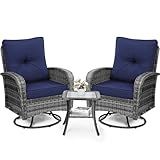
XYgdhqpt for Patio Porch Glider Straps Hanger Set Deck Restoration Part-16 Length 4PCS BLACk
- FITS 16 GLIDERS PERFECTLY-EASY UPGRADE FOR BETTER PERFORMANCE!
- INCLUDES 4 METAL STRAPS AND HARDWARE FOR QUICK INSTALLATION.
- HASSLE-FREE REPLACEMENT-NO MODIFICATIONS NEEDED FOR SETUP!
Cleaning and maintaining outdoor patio gliders is essential to keep them looking good and functioning properly for years to come. Here are some steps to follow:
- Start by removing any cushions or seat pads from the glider. Set them aside for cleaning separately.
- Dust off the glider using a soft-bristle brush or a dry cloth to remove loose dirt, leaves, and debris. Pay attention to all nooks and crannies, including the undersides of the glider.
- Prepare a cleaning solution by mixing mild dish soap or a specialized outdoor furniture cleaner with warm water in a bucket. Avoid using harsh chemical cleaners as they can damage the glider's surface.
- Dip a soft sponge or cloth into the cleaning solution and gently wipe down the entire glider. Be sure to thoroughly clean all surfaces, including the frame, seat, backrest, and arms.
- For stubborn stains or grime, make a paste using baking soda and water. Apply the paste to the affected areas and let it sit for a few minutes. Then, scrub gently with a sponge or brush before rinsing it off with clean water.
- Rinse the entire glider with a hose, ensuring that all soap residues are removed. Avoid using high-pressure settings, as it may damage the glider's paint or finish.
- Allow the glider to air dry completely before applying any protective treatments or reattaching the cushions.
- If your outdoor patio glider has metal components, it is advisable to apply a layer of automotive wax or a specialized metal protectant to prevent rust and corrosion. Follow the product instructions carefully for the best results.
- For wood or wicker gliders, inspect them for any loose or damaged parts. Tighten screws or bolts as needed, and replace any broken or rotting pieces.
- Reattach the seat cushions or pads once the glider is completely dry. If they are machine washable, follow the manufacturer's instructions for cleaning and drying.
- Regularly inspect your outdoor patio glider for signs of wear and tear, especially if it's exposed to harsh weather conditions. Perform routine maintenance tasks such as repainting, resealing, or re-staining the surfaces as required.
By following these steps and regularly cleaning and maintaining your outdoor patio glider, you can ensure its longevity and enjoy many comfortable and relaxing moments outdoors.
How to remove grease stains from outdoor patio gliders?
To remove grease stains from outdoor patio gliders, you can follow these steps:
- Act quickly: Try to address the stain as soon as possible to prevent it from setting in and becoming more difficult to remove.
- Gently scrape off excess grease: Use a plastic scraper or a spoon to carefully remove any excess grease from the surface of the patio glider. Be cautious not to scratch the material.
- Blot with paper towels: Place several layers of paper towels over the stain and press down gently to absorb as much grease as possible. Replace the paper towels as needed.
- Apply dishwashing liquid: Create a solution by mixing a few drops of dishwashing liquid with warm water. Dip a clean cloth or sponge into the solution and gently scrub the grease stain.
- Rinse thoroughly: Use clean water to rinse the area. You can either spray it with a hose or use a bucket of water and a sponge. Make sure to remove all the soap residue.
- Repeat if necessary: If the grease stain remains, you may need to repeat the previous steps until the stain is completely gone. Stubborn stains may require a more specialized cleaning product.
- Dry the glider: Allow the patio glider to air dry completely before using it again. Ensure it is completely dry to prevent any mold or mildew growth.
Note: It's always a good idea to test any cleaning solution or product on a small, inconspicuous area of the patio glider first to make sure it won't cause any damage or discoloration.
What is the recommended cleaning technique for plastic outdoor patio gliders?
To clean plastic outdoor patio gliders, following are the recommended cleaning technique:
- Prepare the cleaning solution: In a bucket, mix warm water with a mild dish soap or a few squirts of gentle multipurpose cleaner. Avoid using abrasive or harsh cleaners that may damage or discolor the plastic.
- Remove cushions: If your glider has cushions, remove them and set them aside for separate cleaning.
- Rinse off debris: Use a garden hose or a bucket of plain water to rinse off any loose dirt, debris, or leaves from the glider. This helps to prevent scratching the plastic during the cleaning process.
- Scrub with a soft brush or cloth: Dip a soft brush or cloth into the cleaning solution and gently scrub the surface of the glider. Pay close attention to any stains, dirt, or grime. If needed, use a little more pressure to remove stubborn stains, but avoid scratching the plastic.
- Clean hard-to-reach areas: Use an old toothbrush or a small brush to clean any narrow or hard-to-reach areas, such as grooves or crevices.
- Rinse thoroughly: Once you've scrubbed the entire surface of the glider, thoroughly rinse it with clean water to remove any remaining soap residue.
- Dry the glider: Wipe down the glider with a clean towel or leave it in the sun to air dry. Make sure all moisture has evaporated before placing cushions back on.
- Clean cushions separately: If your glider had cushions, follow the manufacturer's instructions for cleaning them. Many cushions are machine washable, but it's important to check the label for specific care instructions.
By following these steps, you can effectively clean your plastic outdoor patio gliders and keep them looking their best.
How to replace torn or worn-out cushions on outdoor patio gliders?
To replace torn or worn-out cushions on outdoor patio gliders, follow these steps:
- Remove the Old Cushions: Start by removing the existing cushions from the patio glider. Most cushions are attached using ties or Velcro straps, so untie or unfasten them to completely remove the cushions.
- Measure and Choose New Cushions: Take accurate measurements of the seating area on the glider to determine the appropriate size of replacement cushions. Consider the shape and thickness of the cushions based on your comfort and style preferences. Make sure to choose cushions specifically designed for outdoor use, as they will be more resistant to weather and mildew.
- Purchase Replacement Cushions: Visit a local home improvement store, furniture store, or browse online retailers to find suitable replacement cushions. Consider factors such as comfort, durability, and the climate in your area.
- Attach the New Cushions: Once you've purchased the new cushions, align them on the glider's seating area. If your cushions have attachment ties or Velcro straps, secure them to the glider frame accordingly. If your cushions don't have built-in attachments, consider using adhesive Velcro strips or non-slip rug pads to prevent them from sliding.
- Arrange and Fluff the Cushions: After you've securely attached the new cushions, arrange and fluff them to ensure they are comfortable and aesthetically pleasing. Make sure the cushions are evenly distributed and that their corners or edges are not bunched up or slanted.
- Maintain and Protect: To prolong the life of your new cushions, consider investing in covers specifically designed for outdoor use. These covers will protect the cushions from harsh weather conditions, UV rays, and dirt. Additionally, regularly clean the cushions with mild soap and water, and store them indoors during extreme weather.
By following these steps, you can easily replace torn or worn-out cushions on your outdoor patio gliders, providing you with a comfortable and inviting seating area for outdoor relaxation.
What is the ideal frequency for oiling hinges on outdoor patio gliders?
The ideal frequency for oiling hinges on outdoor patio gliders can vary depending on several factors such as the climate, usage, and type of oil used. However, as a general guideline, it is recommended to oil the hinges of outdoor patio gliders at least once every six months.
Outdoor environment, especially with exposure to moisture and varying temperatures, can cause the hinges to become stiff or rusty over time. Applying oil helps lubricate the hinges, reduce friction, and prevent corrosion.
If the glider is used frequently, or if you notice squeaking or resistance when moving the glider, it may require more frequent oiling. Similarly, if you live in a particularly harsh climate with extreme weather conditions, it might be beneficial to oil the hinges more often, such as every three months.
It is important to use a suitable lubricant for outdoor applications, such as silicone-based or marine-grade oil. These types of oil are more resistant to water and can withstand outdoor conditions better than some other oils.
Ultimately, it is recommended to regularly inspect the hinges and apply oil as needed to ensure smooth and comfortable gliding motion.
What is the recommended method to remove mildew from outdoor patio gliders?
To remove mildew from outdoor patio gliders, here is the recommended method:
- Start by removing any loose dirt or debris from the glider using a broom or brush.
- Create a cleaning solution by mixing equal parts of water and white vinegar in a bucket. White vinegar is a natural mildew killer.
- Dip a sponge or soft brush into the vinegar solution and scrub the affected areas of the glider. Pay extra attention to the mildew spots.
- For tougher stains or more stubborn mildew, you can mix a solution of 1 cup bleach with 1 gallon of water instead of vinegar. Be cautious when using bleach as it may cause discoloration on some types of patio gliders.
- Allow the vinegar or bleach solution to sit on the glider for about 15-20 minutes to penetrate the mildew.
- Scrub the glider again with the vinegar or bleach solution, paying specific attention to the mildew spots.
- Rinse the glider thoroughly with clean water to remove any residue and vinegar or bleach solution.
- If the mildew persists, you can try using a commercial mildew cleaner or a mixture of baking soda and water as a gentler option.
- Once clean, make sure to dry the glider thoroughly to prevent any future mildew growth. You can use a clean cloth or towel to wipe it down or allow it to air dry in the sun.
Remember to follow safety precautions when using bleach, such as wearing gloves and working in a well-ventilated area. Additionally, always refer to the manufacturer's guidelines for specific cleaning instructions for your patio glider material.
What is the recommended way to lubricate moving parts on outdoor patio gliders?
The recommended way to lubricate moving parts on outdoor patio gliders is to use a silicone-based lubricant. Here's how you can proceed:
- Clean: Start by thoroughly cleaning the moving parts of the patio glider. Remove any debris, dirt, or old lubricant.
- Silicone lubricant: Purchase a silicone-based lubricant specifically designed for outdoor use. Silicone is ideal for metal-to-metal or metal-to-plastic sliding surfaces as it is long-lasting and resistant to water.
- Apply lubricant: Apply a small amount of the silicone lubricant to the moving parts of the patio glider. Focus on the areas where friction occurs, such as the metal tracks or joints.
- Spread evenly: Using a clean cloth or your fingers, spread the lubricant evenly across the moving parts. Make sure all contact surfaces are coated, but try not to apply excessive amounts that may attract dust or dirt.
- Test and repeat: Move the patio glider back and forth to distribute the lubricant and ensure smooth movement. If needed, add a little more lubricant and repeat the process until the glider moves easily without any sticking or squeaking.
Remember to regularly maintain and lubricate your patio glider, especially if it is frequently exposed to outdoor elements.