
Best Garden Shovels to Buy in July 2026
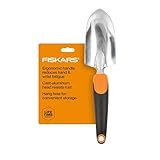
Fiskars Ergo Garden Trowel for Digging and Planting, Heavy Duty Gardening Hand Tool with Hanging Hole
- ERGONOMIC DESIGN REDUCES FATIGUE FOR PROLONGED GARDENING TASKS.
- RUST-RESISTANT CAST-ALUMINUM HEAD EXCELS IN TOUGH SOIL CONDITIONS.
- DURABLE, SHARP TOOLS DESIGNED FOR LASTING PERFORMANCE IN GARDENS.


Hooyman Spade Shovel with Heavy Duty Carbon Steel Head Construction, Ergonomic No-Slip H-Grip Handles, D Handle, and Oversized Steps for Gardening, Land Management, Yard Work, Farming and Outdoors
- TOUGH & DURABLE: HEAVY-DUTY 1050MN CARBON STEEL FOR LONG-LASTING USE.
- SECURE GRIP: NO-SLIP H-GRIP HANDLE ENSURES SAFETY IN ANY CONDITION.
- VERSATILE CUTTING: CUSTOM SERRATED BLADE IDEAL FOR ROOTS AND TOUGH SOIL.
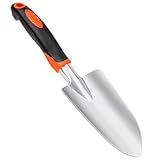
Garden Shovel Garden Hand Trowel, Heavy Duty Hand Shovel with Ergonomic Handle, Small Gardening Tools for Digging, Rust Resistant Gardening Spade Trowel Tools, Orange
-
STURDY ALUMINUM ALLOY: DURABLE DESIGN FOR DEEP DIGGING AND EASY TURF CUTTING.
-
ERGONOMIC GRIP: COMFORT-FOCUSED HANDLE REDUCES FATIGUE WHILE WORKING.
-
VERSATILE & PORTABLE: LIGHTWEIGHT, EASY TO STORE, PERFECT FOR ALL GARDENING TASKS.

GROWIT Heavy Duty Gardening Tools - 22-Piece Gardening Gifts for Women, Men, Mom, Dad - Durable, Ergonomic Garden Tools Set
- ULTIMATE GIFT SET: PERFECT FOR GARDENING ENTHUSIASTS-MEN AND WOMEN!
- COMPLETE 22-PIECE SET: ALL ESSENTIAL TOOLS INCLUDED FOR ANY GARDENER.
- DURABLE & ERGONOMIC: RUST-PROOF TOOLS DESIGNED FOR COMFORT AND EASE.
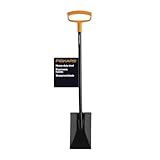
Fiskars 46" Spade Garden Shovel, Steel Flat Spade with Ergonomic D-Handle, Sharp Blade Square Shovel for Lawn Edging, Digging, Heavy Duty Yard Tool, Easy Cuts in Grass and Turf
- ERGONOMIC DESIGN REDUCES FATIGUE FOR ALL-DAY GARDENING COMFORT.
- DURABLE STEEL CONSTRUCTION ENSURES LONGEVITY IN TOUGH CONDITIONS.
- LIFETIME WARRANTY GUARANTEES LASTING VALUE AND RELIABILITY.

Garden Weasel Potting Scoop - Oversized | Dig and Transport | Planting and Gardening Hand Digging Tools, Heavy Duty Soil Scoop, Mini Gardening Shovel | 91362
-
SERRATED TIP FOR EFFORTLESS SOIL CUTTING & SCOOPING!
-
PROFESSIONAL GRADE: UNMATCHED PERFORMANCE FOR GARDENERS!
-
LIFETIME GUARANTEE: QUALITY YOU CAN TRUST, BUILT TO LAST!

Heavy Duty Gardening Hand Trowel - Carbon Steel Garden Trowel with Rubberized Handle, Ideal for Soil Planting, Digging, Transplanting
-
HEAVY-DUTY STRENGTH: CRAFTED FROM QUENCHED 65-MANGANESE STEEL FOR TOUGH TASKS.
-
COMFORT GRIP: ERGONOMIC, NON-SLIP RUBBER HANDLE ENSURES A SECURE HOLD.
-
UNMATCHED DURABILITY: HAND-WELDED SEAMS PROVIDE SUPERIOR LONGEVITY AND STRENGTH.
Choosing the right garden shovel involves considering several important factors to ensure it suits your gardening needs. First, consider the type of gardening work you'll be doing, as different tasks may require specific shovel designs. For general digging and moving soil, a round-point shovel with a sturdy, sharp blade is ideal. If you're dealing with gravel or small planting tasks, a square-point shovel might be more appropriate. The material of the blade is also crucial; steel blades offer strength and durability, while aluminum is lighter but may not be as robust.
Handle material is another factor; hardwood handles provide a good balance of strength and shock absorption, while fiberglass handles are lighter and resistant to weather conditions. The length of the handle should match your height and reach, ensuring comfort and reducing strain on your back. Look for features like a comfortable grip, which can help you maintain control and reduce fatigue during prolonged use. Finally, consider the weight of the shovel relative to your strength and endurance, ensuring it's not too heavy to manage effectively.
How to store a garden shovel to prevent rusting?
To prevent rusting and maintain a garden shovel in good condition, follow these storage and maintenance tips:
- Clean the Shovel: After each use, clean the shovel thoroughly. Remove dirt, mud, or debris with a brush or hose. Dry it completely with a cloth to prevent moisture from causing rust.
- Oil the Blade: Apply a thin layer of oil to the metal parts of the shovel. Use vegetable oil, mineral oil, or a specialized tool oil. This creates a protective barrier against moisture.
- Sharpen and Inspect: Regularly inspect the shovel for dull edges and any damage. Sharpen the edge if needed to keep it efficient and remove any developing rust spots with a wire brush or sandpaper before applying oil.
- Store Indoors: Whenever possible, store the shovel in a dry place like a shed, garage, or basement. Keeping it out of rain and humidity will help prevent rust.
- Hang the Shovel: If possible, hang the shovel on a wall rack or hook. This keeps the blade off the ground and reduces the chance of moisture exposure.
- Avoid Direct Contact with Moisture: Ensure the storage area does not have excess moisture. Avoid storing the shovel directly on the floor, especially in damp environments. Use wooden or plastic racks if possible.
- Consider a Protective Cover: If indoor storage is not an option, consider using a waterproof cover or tarp to protect the shovel from the elements.
By consistently following these maintenance tips, your garden shovel will remain in good condition and resist rust over time.
What is the benefit of a serrated edge on a garden shovel?
A serrated edge on a garden shovel offers several benefits that can enhance its functionality and efficiency:
- Cutting Power: The serrated edge can act like a saw, making it easier to cut through tough materials such as roots, hard soil, or compacted materials. This is particularly useful when you need to penetrate and break through dense surfaces.
- Enhanced Digging Ability: The teeth on the serrated edge can help grip and slice through the soil more effectively, providing better leverage and reducing the effort needed to dig into hard or rocky ground.
- Versatility: A serrated shovel can be used for a variety of gardening tasks, including cutting sod, dividing perennials, or removing stubborn weeds. This makes it a versatile tool for gardeners who encounter a range of conditions.
- Improved Efficiency: By reducing the amount of force required to cut through obstacles, a serrated edge can speed up gardening tasks, making them easier and quicker to accomplish.
- Durability of the Edge: Serrated edges typically stay sharper longer compared to straight edges, as the teeth take on some of the pressure and reduce overall wear.
Overall, a serrated edge on a garden shovel enhances its cutting capability, making it a more versatile and efficient tool in various gardening scenarios.
How to use a garden shovel for edging flower beds?
Using a garden shovel for edging flower beds is a straightforward process. Here’s a step-by-step guide to help you create clean and defined edges:
- Choose the Right Shovel: For edging, a flat-edged or square shovel is often most effective. Its straight blade helps create clean lines.
- Plan Your Edge: Decide where you want the edges of your flower bed. You can use a garden hose or string to outline the desired shape, especially for curved edges.
- Check Soil Conditions: It's best to edge after rain when the soil is moist but not soggy, making it easier to cut through. Avoid very dry or overly wet conditions.
- Position the Shovel: Stand on the grass side, facing the flower bed. Hold the shovel vertically with the blade aligned along your marked line.
- Make the Cut: Step down on the shovel’s blade with your foot to push it into the ground. Aim for a depth of about 4 to 6 inches, depending on your border preference.
- Remove Sod: Once the cut is made, tilt the handle of the shovel back slightly, using it as a lever to lift out the sod. For a cleaner edge, you might need to repeat this along your line and remove the sod completely.
- Define the Edge: If you want a more pronounced edge, you can slope the soil down from the edge to create a trench-like effect inside the flower bed.
- Dispose of Sod: If the removed sod is in good condition, consider using it to patch other parts of your lawn. Otherwise, add it to your compost pile.
- Clean Up: Rake any loose soil back into the bed or use it to create a gentle slope down from the edge to keep mulch in place.
- Maintenance: Regularly maintaining your edges with a garden shovel will make the task easier over time and keep your flower beds looking tidy.
Remember to wear proper footwear for safety and take breaks as needed, especially if you’re working with large beds or tough soil.
How to decide between a wood and fiberglass shovel handle?
Deciding between a wood and fiberglass shovel handle involves considering several factors that impact durability, comfort, weight, and cost. Here are some key points to help guide your decision:
- Durability: Wood: Wood handles, usually made from ash or hickory, are resilient but can be susceptible to weathering, splintering, and breaking if not properly maintained. Fiberglass: Generally more durable and resistant to weather conditions. It doesn’t splinter and is less susceptible to breaking or rotting compared to wood.
- Weight: Wood: Typically heavier than fiberglass, which can be tiring to use over long periods, but the extra weight often provides a more solid feel. Fiberglass: Usually lighter, making it easier to handle for prolonged use and reducing fatigue.
- Comfort and Vibration: Wood: Absorbs vibrations more effectively, which can make it more comfortable to use, especially for heavy-duty tasks. Fiberglass: Can transfer more vibrations to the hands, although many fiberglass handles now come with comfortable grips to mitigate this issue.
- Cost: Wood: Often less expensive initially but could incur additional costs for maintenance and replacement over time. Fiberglass: Typically more expensive upfront but can be more cost-effective in the long run due to its durability and lower maintenance requirements.
- Aesthetics and Feel: Wood: Many users prefer the natural look and feel of wood for its traditional aesthetic. Fiberglass: Has a modern look and comes in various colors, which can be appealing and offer better visibility if left on the ground.
- Environmental Conditions: Wood: May not perform as well in very wet or dry conditions unless properly treated or maintained. Fiberglass: Performs well in a variety of conditions and is less affected by moisture or temperature changes.
Ultimately, the decision should be based on the specific needs and preferences of the user. If you value tradition and comfort, and don’t mind the possibility of more frequent replacements, a wood handle might be suitable. If you prefer a low-maintenance, durable option that withstands various conditions, a fiberglass handle could be the better choice.