Best Humidifier Care to Buy in July 2026
The Original Humidifier Drops - Premium Food Grade Concentrate, Slows Down Residue Accumulation on Surfaces, Minimizes Scaling - Freshens Water in All Humidifier Models, 100+ Day Supply, Made in USA
- TRUST THE ORIGINAL: FIRST AND ONLY AUTHENTIC HUMIDIFIER TREATMENT!
- PEAK PERFORMANCE: ADVANCED FORMULA KEEPS YOUR HUMIDIFIER HEALTHY.
- LESS CLEANING, MORE LIVING: PROLONGS LIFE AND REDUCES MAINTENANCE HASSLE!


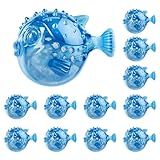
Protec Humidifier Cleaning Fish, Tank Cleaner, Fights Slime & Odor, Lasts 30 Days, 1 Count, Color May Vary
- REDUCE SLIMY BUILDUP FOR FRESHER, CLEANER HUMIDIFIER MIST!
- LONG-LASTING CLEANING: LASTS 30 DAYS IN MOST HUMIDIFIERS.
- GENTLE, CHEMICAL-FREE FORMULA SAFE FOR ALL PERSONAL HUMIDIFIERS!
![Durabasics [2 Pack] Humidifier Drops for Cleaning - Food Grade Humidifier Cleaner Slows Buildup & Scaling - Cleans & Deodorizes Water - Suitable for All Models - 200+ Day Supply - Made in USA](https://cdn.blogweb.me/1/51pf2dp_LEPL_SL_160_81638cf0a0.jpg)
Durabasics [2 Pack] Humidifier Drops for Cleaning - Food Grade Humidifier Cleaner Slows Buildup & Scaling - Cleans & Deodorizes Water - Suitable for All Models - 200+ Day Supply - Made in USA
- EXTEND HUMIDIFIER LIFE WITH FEWER CLEANINGS AND REDUCED SCALING!
- PROUDLY MADE IN THE USA FOR TOP QUALITY AND EFFECTIVENESS!
- ENJOY FRESHER AIR WITH ODOR-FIGHTING, HIGH-QUALITY DROPS!

Funmit Humidifier Cleaning Fish, 6 Pack Humidifier Cleaner for Humidifiers and Fish Tanks, Purifies Water, Prevents Hard Water Build-Up, Reduces Scale, Purple
- ENSURE CLEANER AIR WITH OUR EFFICIENT HUMIDIFIER CLEANING FISH!
- COMPATIBLE WITH MOST HUMIDIFIERS FOR VERSATILE, EASY USE!
- DURABLE DESIGN PROMISES LONG-LASTING PERFORMANCE & RELIABLE RESULTS!

Leemone Humidifier Cleaner 12 Pack, Demineralization Cleaning Ball, Works in All humidifiers and Fish Tanks, Purifies Water, Prevents Hard Water Build-Up, Reduces Scale
- WORKS IN ALL HUMIDIFIERS AND EVEN FISH TANKS FOR VERSATILE USE!
- REDUCES MINERAL BUILD-UP TO KEEP DEVICES RUNNING SMOOTHLY.
- PURIFIES WATER, CUTTING ODOR GROWTH AND CLEANING TIMES IN HALF!
BestAir 3BT-PDQ-6 Original BT Humidifier Bacteriostatic Water Treatment, 32 fl oz, Single Pack
- BUILT TO LAST: ENJOY LONG-LASTING DURABILITY FOR YOUR NEEDS!
- DESIGNED FOR YOU: TAILORED TO MEET CUSTOMER EXPECTATIONS PERFECTLY.
- QUALITY CRAFTSMANSHIP: MADE IN CHINA WITH ATTENTION TO DETAIL.
12-Pack Universal Humidifier Cleaning Fish Compatible with Most Humidifiers Replacement Ultrasonic Humidifier Tank Cleaner Ball | Prevents Hard Water Build-Up | Eliminate White Dust | Purifies Water
- ELIMINATE ODORS & BUILDUP: HIGH-QUALITY RESIN ABSORBS IMPURITIES EFFECTIVELY.
- REDUCE WHITE DUST: PREVENTS MINERAL RESIDUES FOR A HEALTHIER ENVIRONMENT.
- VERSATILE COMPATIBILITY: FITS MOST HUMIDIFIERS, LARGE OR SMALL TANKS.
Humidifiers should be cleaned regularly to maintain proper functioning and prevent the growth of bacteria, mold, and other contaminants. The frequency of cleaning a humidifier depends on several factors, including the type of humidifier, usage patterns, water quality, and manufacturer's recommendations. However, a general guideline is to clean a humidifier at least once every week or two.
The water tank of a humidifier should be emptied, rinsed, and wiped out with a soft cloth. It is essential to avoid using abrasive cleaners, chemicals, or harsh soaps that can damage the humidifier or leave residue. Additionally, any mineral deposits or scale buildup can be removed by soaking the tank in a mixture of water and vinegar or using specialized cleaning solutions recommended by the manufacturer.
The humidifier's filter or wick (if applicable) also requires regular maintenance. Depending on the model, the filter may need to be replaced every few months or cleaned more frequently. Check the specific instructions provided by the manufacturer to know how often it needs to be cleaned or replaced.
Proper maintenance is crucial to ensure that a humidifier continues to provide clean and healthy moisture to the environment, promoting comfort and improved air quality. Neglecting regular cleaning may result in the dispersal of contaminants into the air and potential health hazards.
What cleaning schedule is suitable for a humidifier used daily?
For a humidifier used daily, it is essential to clean and maintain it regularly to prevent the growth of bacteria, mold, and other harmful substances. Here is a suitable cleaning schedule for a humidifier used daily:
- Daily Maintenance: Empty and refill the water tank with fresh, distilled water every day. Do not leave stagnant water in the tank. Wipe the exterior of the humidifier with a damp cloth to remove any dust or dirt.
- Weekly Maintenance: Disinfect the water tank and other removable parts: Unplug the humidifier and empty the tank. Fill the tank with a solution of equal parts white vinegar and water or use a manufacturer-recommended humidifier cleaner. Let the solution sit in the tank for at least 30 minutes. Scrub the tank using a soft brush or sponge to remove any mineral deposits or buildup. Rinse the tank and other removable parts thoroughly with water to remove any residual cleaning solution. Allow all parts to air dry completely before reassembling the humidifier.
- Monthly Maintenance: Descale the humidifier: Repeat the above steps for cleaning the tank but using only distilled water. Use a soft brush or cloth to remove any built-up mineral deposits from the heating element or other surfaces. Rinse the tank and other parts thoroughly with distilled water to remove any residue. Allow all parts to air dry completely before reassembling.
- Seasonal Maintenance: Deep clean the entire humidifier: Follow the steps for weekly maintenance cleaning, including using a cleaning solution or vinegar to thoroughly clean all parts. Pay extra attention to the areas prone to mineral buildup or mold growth. Rinse all parts thoroughly with water and allow them to air dry before reassembling.
Remember to always follow the manufacturer's instructions for cleaning and maintenance specific to your humidifier model. Regular cleaning and maintenance will ensure your humidifier operates efficiently and provides clean, healthy moisture in the air.
What is the difference between manual and automatic humidifier cleaning?
The main difference between manual and automatic humidifier cleaning is the level of effort required to clean the device.
Manual Humidifier Cleaning:
- Disassembly: In manual cleaning, the user needs to disassemble the humidifier by separating the water tank, filter, and other removable parts.
- Hand Cleaning: Each component is manually cleaned using water, mild detergent, and a brush or cloth. This involves scrubbing away mineral deposits, mold, and other accumulated residues.
- Rinse and Dry: After cleaning, all components are rinsed thoroughly to remove any remaining cleaning agents. Then they are air-dried to prevent the growth of bacteria.
- Reassembly: Finally, the humidifier is reassembled before being used again.
Automatic Humidifier Cleaning:
- Self-Cleaning Function: Automatic humidifiers typically come with a self-cleaning feature. This feature uses technologies like ultrasonic vibrations or steam to minimize the buildup of mineral deposits or mold.
- Anti-Microbial Features: Some automatic humidifiers have built-in anti-microbial properties that help reduce the growth of bacteria or mold within the device.
- Periodic Maintenance: Despite the automatic cleaning features, periodic maintenance is still required. This usually involves rinsing the water tank, replacing filters, or removing any accumulated residue.
Overall, manual cleaning requires more effort and time, as it involves hands-on cleaning of each component. Automatic cleaning minimizes the effort required but may still need occasional manual maintenance.
What is the best cleaning solution for humidifiers?
The best cleaning solution for humidifiers is a mixture of white vinegar and water. Vinegar is a natural disinfectant that can remove mineral buildup, mold, and bacteria. To clean your humidifier, follow these steps:
- Empty the water tank of the humidifier and unplug it from the power source.
- Mix equal parts white vinegar and water in a bowl or sink.
- Use a soft brush or cloth soaked in the vinegar-water solution to clean the inside of the water tank. Pay particular attention to any areas with mineral deposits or mold.
- For smaller parts or hard-to-reach areas, you can soak them in the vinegar-water solution for about 20 minutes.
- Rinse all the parts thoroughly with clean water to remove any vinegar residue.
- For the base or reservoir, fill it with the vinegar-water solution, let it sit for about 20 minutes, and then scrub it with a brush.
- Rinse the base or reservoir thoroughly with clean water as well.
- Once all the parts are clean, reassemble the humidifier and fill it with fresh water.
- Run the humidifier for a few minutes to ensure that any remaining vinegar is flushed out.
It's important to follow the manufacturer's instructions and recommendations for cleaning your specific model of humidifier.
How to clean hard-to-reach areas of a humidifier?
Cleaning hard-to-reach areas of a humidifier can be challenging, but with the right approach, it can be done effectively. Here's a step-by-step guide to cleaning those inaccessible parts:
- Safety first - Ensure the humidifier is disconnected from the power source and completely turned off before starting the cleaning process. This prevents any accidents or damage.
- Disassemble the humidifier - Take apart the removable components of the humidifier, such as the water tank, filter, and any other accessible parts. Refer to the user manual if you are unsure about the disassembly procedure.
- Prepare cleaning solution - Fill a basin or sink with warm water and add a mixture of mild detergent or vinegar. This solution will help to break down any mineral deposits, mold, or bacteria present.
- Soak the parts - Submerge the disassembled parts into the cleaning solution and let them soak for about 30 minutes. This will loosen any dirt and make cleaning easier.
- Scrub with a brush - After the parts have soaked, take a soft brush or sponge and gently scrub any remaining dirt or residue. Focus on hard-to-reach areas like small crevices or corners. Be careful not to damage any delicate parts.
- Rinse thoroughly - Once scrubbed, rinse all parts thoroughly under running water to remove any traces of the cleaning solution. Ensure all detergent or vinegar is completely removed.
- Dry the components - Use a clean cloth or towel to wipe off excess moisture from each part. Allow them to air dry completely before reassembling the humidifier. This will prevent any mold or mildew growth.
- Clean the exterior - While the components dry, wipe the exterior of the humidifier with a damp cloth to remove any dust or dirt buildup.
- Reassemble and test - Once all components are thoroughly dry, reassemble the humidifier as per the user manual. Ensure all parts fit securely, ensuring there are no leaks. Plug in the power source and test the humidifier to make sure it is functioning properly.
Remember to regularly clean your humidifier, ideally once a week, to prevent the accumulation of mineral deposits, mold, or bacteria. This will help maintain its performance and extend its lifespan.