
Best Smart Thermostats to Buy in July 2026
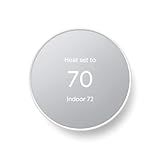
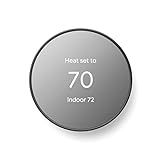
Google Nest Thermostat - Smart Thermostat for Home - Programmable Wifi Thermostat - Snow
- SAVE ENERGY: AUTO-ADJUSTS TEMPERATURE WHEN YOU LEAVE HOME.
- EASY CONTROL: MANAGE SETTINGS REMOTELY VIA PHONE OR SMART DEVICE.
- SMART FEATURES: ALERTS FOR HVAC ISSUES + SUGGESTIONS FOR SAVINGS.


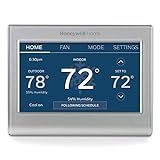
Honeywell Home RTH9585WF1004 Wi-Fi Smart Color Thermostat, 7 Day Programmable, Touch Screen, Energy Star, Alexa Ready, Gray
-
PERSONALIZE YOUR COMFORT: MATCH YOUR THERMOSTAT TO YOUR DÉCOR HUES.
-
SAVE ENERGY & GET REWARDS: TAP INTO UTILITY REBATES AND DEMAND PROGRAMS.
-
FLEXIBLE SCHEDULING: TAILOR SETTINGS TO FIT YOUR LIFESTYLE EFFORTLESSLY.
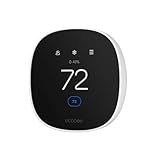
ecobee Smart Thermostat Essential - Energy Star Certified programmable Wi-Fi Thermostat - Works with Siri, Alexa, and Google Assistant
- SAVE UP TO 23% ANNUALLY ON HEATING AND COOLING COSTS EFFORTLESSLY!
- DIY INSTALLATION MADE EASY-NO C-WIRE NEEDED WITH OUR POWER EXTENDER KIT.
- COMPATIBLE WITH MAJOR SMART HOME SYSTEMS LIKE APPLE, GOOGLE, AND ALEXA!
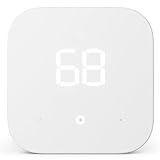
Amazon Smart Thermostat – Save money and energy - Works with Alexa and Ring - C-wire required
- SAVE UP TO $50 YEARLY WITH ENERGY STAR CERTIFIED TECHNOLOGY!
- ENJOY AUTOMATIC TEMPERATURE CONTROL FOR HOME, AWAY, AND SLEEP!
- EFFORTLESSLY MANAGE COMFORT ZONES WITH ECHO AND ALEXA APP!
Google Nest Thermostat - Smart Thermostat for Home - Programmable Wifi Thermostat - Charcoal
- SAVE ENERGY: ADJUSTS AUTOMATICALLY WHEN YOU LEAVE HOME.
- CONTROL REMOTELY: CHANGE SETTINGS VIA SMARTPHONE OR TABLET ANYWHERE.
- COMPATIBLE WITH VOICE ASSISTANTS: WORKS WITH GOOGLE ASSISTANT AND MORE.
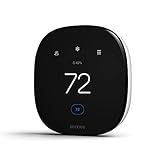
ecobee Smart Thermostat Enhanced - Programmable Wifi Thermostat - Works with Siri, Alexa, Google Assistant - Energy Star Certified - Smart Home
- SAVE 26% YEARLY ON HEATING/COOLING COSTS WITH SMART ADJUSTMENTS!
- PREHEAT/COOL YOUR HOME FOR PERFECT COMFORT UPON ARRIVAL!
- CONTROL YOUR THERMOSTAT ANYTIME, ANYWHERE VIA SMARTPHONE APP!
Smart thermostats are designed to enhance energy efficiency and provide greater control over home heating and cooling systems, but their compatibility with HVAC systems can vary. Most smart thermostats are compatible with standard HVAC systems, including systems with central air conditioning or heating. However, compatibility can depend on the specifics of the HVAC system in question, such as its age, type, and wiring. Smart thermostats typically work well with low-voltage systems, which are common in most homes. These include systems like forced air, radiant, and heat pumps. On the other hand, systems that use line voltage, such as electric baseboard heaters, may not be compatible with all smart thermostats, unless specifically designed to do so. Before purchasing a smart thermostat, it is essential to check the manufacturer's compatibility guidelines. This often involves checking the wiring of the existing thermostat and the voltage requirements. Additionally, some advanced HVAC systems with multi-stage heating or cooling or variable-speed fans may require more sophisticated smart thermostats that can support these features. In some cases, installation might need a professional to ensure proper integration, especially if a common wire (C-wire) is required for powering the thermostat. Therefore, while many HVAC systems can work with smart thermostats, confirming specific compatibility requirements is crucial to avoid installation issues and to fully utilize the smart thermostat's features.
How to set up a smart thermostat for the first time?
Setting up a smart thermostat for the first time can vary slightly depending on the brand and model, but the general process is similar. Here are the basic steps to help you get started:
Step 1: Gather Your Tools
- Screwdriver
- Drill (if needed)
- Smartphone with the app for your smart thermostat
Step 2: Turn Off Power
- Turn off the power to your HVAC system at the circuit breaker to ensure safety while working with the wiring.
Step 3: Remove the Old Thermostat
- Remove the faceplate of your existing thermostat.
- Take a picture of the wiring for reference. Label wires according to their terminal letters using masking tape or stickers.
- Unscrew and remove the baseplate of the old thermostat.
Step 4: Install the New Thermostat Base
- If your new thermostat requires a C-wire (common wire) and you don’t have one, you may need an adapter or to run a new wire.
- Pull the labeled wires through the new thermostat base.
- Use the provided screws to mount the base to the wall. Ensure it’s level.
Step 5: Connect the Wires
- Connect the wires to the appropriate terminals on the new thermostat’s base according to the labels and your reference photo.
- Ensure the wires are securely attached and there are no loose connections.
Step 6: Attach the Thermostat Faceplate
- Attach the faceplate to the base. It typically snaps into place.
Step 7: Turn the Power Back On
- Restore power to your HVAC system at the circuit breaker.
Step 8: Set Up the Thermostat
- Turn on the thermostat if it doesn’t power up automatically.
- Follow the on-screen prompts to set up the device. This usually includes selecting your language, connecting to your Wi-Fi network, and entering basic information about your home and HVAC system.
Step 9: Install the Mobile App
- Download the mobile app for your smart thermostat. Popular brands have dedicated apps available on both iOS and Android.
- Create an account if you haven’t already.
- Follow the app’s instructions to pair your smartphone with the thermostat. This often involves scanning a QR code or entering a unique code displayed on the thermostat.
Step 10: Configure Settings
- Use the mobile app to set your preferred temperature settings, schedules, and any smart features (such as geofencing, learning algorithms, etc.)
- You may also have options to connect with smart home systems like Amazon Alexa, Google Assistant, or Apple HomeKit.
Step 11: Test the System
- Test heating and cooling to ensure the thermostat is controlling your HVAC system correctly.
- Make any necessary adjustments through the app or directly on the thermostat.
Additional Tips
- Refer to the user manual for your specific model for detailed instructions and troubleshooting.
- If you’re uncomfortable with wiring or installation, consider hiring a professional to ensure proper and safe installation.
How to use a smart thermostat with a multi-zone HVAC system?
Using a smart thermostat with a multi-zone HVAC system can enhance your ability to manage and optimize your heating and cooling effectively. Here’s a general guide to help you set it up:
Equipment Assessment
- Identify Compatibility: Ensure the smart thermostat is compatible with your HVAC system and supports multi-zone functionality. Some popular brands like Ecobee and Nest offer models that can handle multiple zones.
- Check Wiring: Verify that your system’s wiring is compatible with the smart thermostat. Multi-zone systems often require more complex wiring, so consult the thermostat's compatibility guide.
Installation Process
- Turn Off Power: Switch off the power to the HVAC system to prevent any electrical mishaps during installation.
- Remove Old Thermostats: Carefully remove the old thermostats from each zone, taking note of how they are wired. Label the wires as needed to ensure they match the compatible connections on the new thermostat.
- Install Smart Thermostat: Mounting: Attach the backplate of the smart thermostat in place of the old one. Use wall anchors if necessary. Wiring: Connect the wires to the appropriate terminals in the smart thermostat according to the manual. Attach Thermostat: Place the thermostat onto the backplate and secure it.
- Zone Controls: If your system uses zone control panels, ensure they are compatible with a smart thermostat. Some setups may require additional equipment like a relay to integrate seamlessly.
Multi-Zone Configuration
- Connect to Wi-Fi: Power the smart thermostat and follow on-screen instructions to connect it to your home’s Wi-Fi network.
- App Setup: Download the thermostat's app on your smartphone or computer. Many smart thermostats require app access for full functionality.
- Configure Zones: Naming Zones: Assign names to each zone for easy identification. Scheduling: Set custom schedules for each zone based on your lifestyle needs and preferences. Many smart thermostats can learn preferences over time and suggest optimized schedules.
- Adjust Temperature Settings: Configure temperature set points for each zone independently to ensure comfort and energy efficiency.
System Integration and Management
- Smart Home Integration: Integrate your thermostat with smart home platforms like Amazon Alexa, Google Assistant, or Apple HomeKit for voice control and automation features.
- Monitor and Adjust: Use the thermostat’s app to monitor temperatures, make adjustments, and respond to alerts or system suggestions. Some systems offer detailed energy reports and tips for improving efficiency.
- Consider Sensor Add-ons: For increased accuracy and control of specific areas, consider adding remote sensors. These can provide temperature readings from various locations and help optimize comfort in each zone.
Troubleshooting
- Consult Manuals: Keep the user manual handy for troubleshooting any issues during setup or operation.
- Professional Help: If you encounter complex wiring or zone control integrations, consider hiring a professional HVAC technician to assist with the installation.
By following these steps, you can effectively utilize a smart thermostat to manage a multi-zone HVAC system, improving efficiency and creating a more comfortable environment in your home.
What is the benefit of using a smart thermostat?
Using a smart thermostat offers several benefits:
- Energy Efficiency: Smart thermostats can significantly reduce energy usage by optimizing heating and cooling schedules based on your lifestyle and preferences. This can lead to reduced utility bills.
- Remote Control: These devices can be controlled remotely via smartphone apps, allowing you to adjust the temperature from anywhere. This is particularly useful for ensuring comfort when you arrive home or for turning off the system when you're away unexpectedly.
- Learning Capabilities: Many smart thermostats have learning algorithms that adapt to your habits over time, automatically adjusting settings for maximum comfort and efficiency.
- Integration with Smart Home Systems: Smart thermostats can often integrate with other smart home devices and ecosystems, such as Amazon Alexa, Google Assistant, or Apple HomeKit, allowing for seamless voice control and automation.
- Environmentally Friendly: By optimizing energy usage, smart thermostats help reduce your carbon footprint, contributing to environmental conservation.
- Data and Insights: These devices provide detailed reports and insights into your energy consumption patterns, helping you make informed decisions about how to conserve energy.
- Zoning Capabilities: Some smart thermostats allow for zoning, which means you can control temperatures in different areas of your home independently, enhancing both comfort and efficiency.
- Alerts and Maintenance Reminders: Smart thermostats can send alerts if there are sudden temperature changes or if the system needs maintenance, ensuring your HVAC system is always functioning optimally.
By combining these features, a smart thermostat not only increases convenience and comfort but also promotes cost-effectiveness and environmental responsibility.
How to replace a traditional thermostat with a smart thermostat?
Replacing a traditional thermostat with a smart thermostat can help improve energy efficiency and provide more control over your home's heating and cooling systems. Here’s a guide to help you through the process:
- Choose Compatibility: Ensure the smart thermostat you select is compatible with your HVAC system. Most smart thermostats are compatible with standard systems, but verifying compatibility is important, especially if you have a multi-stage system, heat pump, or electric baseboard heating.
- Turn Off Power: Safety first. Turn off power to your HVAC system at the circuit breaker to avoid electrical shock.
- Remove the Old Thermostat: Remove the thermostat cover. Most covers snap off, but some may require unscrewing. Take a picture of the wiring for reference. Make sure you label or note each wire connected to the old thermostat. Gently disconnect the wires and remove the old thermostat from the wall.
- Install the Smart Thermostat Base: If your new thermostat comes with a trim plate, use it to cover any holes or marks left by the old thermostat. Thread the existing wires through the base of the new thermostat. Use the built-in level, if available, to make sure the base is straight, then attach it to the wall using screws and anchors.
- Connect the Wires: Follow the labels and/or photo you took to connect each wire to the corresponding terminal in the new thermostat. Most smart thermostats come with labeled stickers to help with this process. Make sure the wires are securely connected and not touching each other.
- Attach the Thermostat Display: Once all wires are connected, attach the thermostat display or faceplate onto the base. This usually just snaps into place.
- Power Up: Turn the power back on at the circuit breaker. The thermostat should power on within a few moments. If not, double-check the wiring.
- Configure Settings: Follow the instructions on the thermostat display or app to connect the device to your Wi-Fi network and configure initial settings. Download the thermostat's app on your smartphone to finish setting up and to control the thermostat remotely.
- Test the System: Test both heating and cooling functions to ensure everything works correctly. Make any necessary adjustments in the app or on the thermostat.
- Check C-Wire Requirement: Some smart thermostats require a common wire (C-wire) for constant power. If your current setup lacks one, you might need to use a C-wire adapter or have an installer run a new wire.
By following these steps, you should be able to successfully replace your traditional thermostat with a smart thermostat. If you're uncomfortable with electrical work or if issues arise, consider hiring a professional to complete the installation.
What is demand response in the context of smart thermostats?
Demand response in the context of smart thermostats refers to the strategic adjustment of electricity consumption by end-users in response to signals from utility companies, grid operators, or regulatory bodies. The aim is to balance supply and demand on the electrical grid, especially during peak usage times, emergencies, or when renewable energy supply is low.
Smart thermostats play a critical role in demand response by providing a platform for automated control of heating and cooling systems in homes and businesses. Here's how it generally works:
- Automated Adjustments: Smart thermostats can automatically adjust heating and cooling settings in response to demand response signals or incentives. For example, during peak demand periods, the thermostat might increase the set temperature slightly in summer or decrease it in winter to reduce electricity use.
- User Participation: Users can opt into demand response programs, often in exchange for financial incentives. These programs might allow a utility to control the thermostat remotely during peak periods or let users manually adjust settings in response to real-time pricing changes.
- Grid Stability: By reducing or shifting energy use, smart thermostats help maintain grid stability and prevent blackouts. This is especially important as grids incorporate more variable renewable energy sources like solar and wind.
- Energy Savings: Participating in demand response can lead to energy savings for consumers through reduced energy bills and incentives. It also contributes to a more sustainable energy ecosystem by reducing the need for additional fossil fuel-based power generation during peak times.
Overall, demand response through smart thermostats is an integral part of modern energy management and the transition towards more sustainable and resilient energy systems.