
Best Easy-to-Clean Air Fryers to Buy in July 2026

Cosori 9-in-1 TurboBlaze Air Fryer 6 Qt, Premium Ceramic Coating, 90°–450°F, Precise Heating for Even Results, Air Fry, Roast, Bake, Broil, Dry, Frozen, Proof, Reheat, Keep Warm, 120V, Dark Gray
- TURBOBLAZE TECH: 3600 RPM FAN FOR PERFECTLY CRISPY MEALS!
- COOK 95% LESS OIL, INDULGING GUILT-FREE IN YOUR FAVORITES!
- DISHWASHER-SAFE DESIGN MAKES CLEANUP A BREEZE!


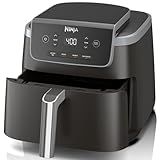
Ninja | Air Fryer | 4-in-1 Pro Air Fry, Roast, Reheat, Dehydrate | 5QT Capacity fits up to 4lbs of French Fries | 400F Max Temp | Nonstick Basket & Crisper Plate | 120V | Grey | AF141
-
HOT, CRISPY RESULTS WITH 400℉ AIR CRISP TECHNOLOGY-NO OIL NEEDED!
-
LARGE 5-QT CAPACITY FITS 4 LBS OF FRIES OR 5 LBS OF WINGS EASILY.
-
4-IN-1 FUNCTIONALITY: AIR FRY, ROAST, REHEAT, AND DEHYDRATE!
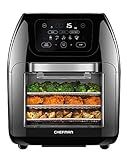
CHEFMAN Multifunctional Digital Air Fryer+ Rotisserie, Dehydrator, Convection Oven, 17 Touch Screen Presets Fry, Roast, Dehydrate, Bake, XL 10L Family Size, Auto Shutoff, Large Easy-View Window, Black
-
VERSATILE COOKING: AIR FRY, BAKE, AND ROAST IN ONE SMART APPLIANCE.
-
FASTER MEALS: COOK WITH RAPID HEAT, NO PREHEATING NEEDED!
-
HEALTHY & EASY: 98% LESS OIL FOR GUILT-FREE, QUICK MEALS.
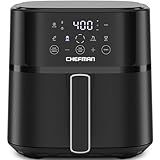
Chefman Air Fryer – 6 QT Compact Airfryer for Quick & Easy Meals in Minutes, Features Hi-Fry Technology for Extra Crisp, Touchscreen Controls with 4 Presets, Nonstick & Dishwasher Safe Basket - Black
- FAST, CUSTOM COOKING: DIGITAL CONTROLS & PRESETS FOR QUICK MEALS.
- CRISPY PERFECTION: HI-FRY TECH FOR CRUNCH WITHOUT EXTRA OIL.
- COMPACT DESIGN: SPACE-SAVING STYLE PERFECT FOR ANY KITCHEN!
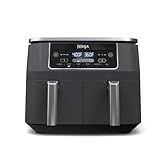
Ninja DZ201 Foodi 8 Quart 6-in-1 DualZone 2-Basket Air Fryer with 2 Independent Frying Baskets, Match Cook & Smart Finish to Roast, Broil, Dehydrate & More for Quick, Easy Meals, Grey
- COOK 2 FOODS SIMULTANEOUSLY WITH 2 INDEPENDENT BASKETS!
- SMART FINISH & MATCH COOK FOR PERFECT TIMING AND EFFICIENCY.
- 6-IN-1 FUNCTIONALITY OFFERS VERSATILE COOKING OPTIONS FOR FAMILIES.
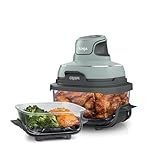
Ninja Crispi 4-in-1 Glass Air Fryer | 450°F | Non-Toxic | 4QT & 6-Cup Glass Containers w/Lids | Microwave, Freezer, Dishwasher Safe | Max Crisp, Air Fry, Bake, Recrisp | Green | FN101SG
- VERSATILE COOKING: 4-IN-1 FUNCTIONALITY: MAX CRISP, BAKE, AIR FRY, RECRISP.
- HEALTHY & SAFE: NONTOXIC CLEANCRISP GLASSWARE FOR WORRY-FREE MEALS.
- CONVENIENT STORAGE: SPACE-SAVING DESIGN WITH EASY-TO-CLEAN, NESTABLE CONTAINERS.
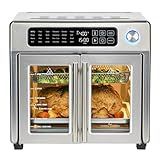
Emeril Lagasse Extra Large French Door Air Fryer Toaster Oven Combo, 24 Cooking Functions and Digital Controls, 7 Accessories Included, Stainless Steel Finish, 26QT Capacity
-
VERSATILE MULTI-COOKER: AIR FRY, ROAST, AND TOAST ALL IN ONE APPLIANCE!
-
BURN-FREE TOASTING: AUTOMATIC SHUT-OFF ENSURES PERFECTLY DONE TOAST EVERY TIME.
-
SPACIOUS DESIGN: 26-QUART CAPACITY FOR MEALS THAT SERVE 4-6 GUESTS EASILY!
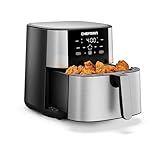
Chefman Air Fryer 8 Qt | TurboFry® 4-in-1 with 450°F Hi-Fry Option for Crispier Results | Bake, Dehydrate, Frozen | XL Nonstick Dishwasher-Safe Basket | Stainless Steel
- HEALTHIER FRIED FAVORITES: ENJOY CRISPY MEALS WITH FEWER CALORIES!
- FOUR VERSATILE FUNCTIONS: AIR FRY, BAKE, REHEAT, AND FROZEN FOR ALL NEEDS.
- EASY CLEANUP: NONSTICK BASKET IS DISHWASHER SAFE FOR HASSLE-FREE CLEANING.
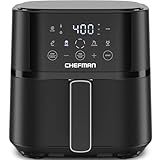
Chefman Air Fryer – 4 QT Compact Airfryer for Quick & Easy Meals in Minutes, Features Hi-Fry Technology for Extra Crisp, Touchscreen Controls with 4 Presets, Nonstick & Dishwasher Safe Basket - Black
- FAST & EASY COOKING: DIGITAL TOUCH SCREEN FOR QUICK, CUSTOM MEALS.
- CRISPY PERFECTION: HI-FRY TECHNOLOGY DELIVERS EXTRA CRUNCH AT 450°F.
- COMPACT & STYLISH: SPACE-SAVING DESIGN FITS PERFECTLY ON ANY COUNTER.

bella 4Qt Slim Air Fryer, Fits-anywhere™ Kitchenware, EverGood™ Ceramic Nonstick Coating, Adjustable Temperature, 6 Preset Cooking Options, 60 Min Auto Shutoff w Audible Tone, 3.3lb Capacity, Oatmilk
-
SPACE-SAVING DESIGN: FITS SEAMLESSLY IN ANY KITCHEN, SAVING 50% MORE SPACE.
-
HEALTHY COOKING: PFAS-FREE NONSTICK COATING FOR EASY CLEANUP AND MEALS.
-
LARGE CAPACITY BASKET: COOK 3.3 LBS OF FOOD AT ONCE FOR EFFICIENT FAMILY MEALS.
Air fryers are generally considered easy to clean, which adds to their appeal. Most models are designed with removable, non-stick baskets or trays that can be washed separately, often even in a dishwasher. The exterior typically requires only a simple wipe-down with a damp cloth. However, the ease of cleaning can also depend on the specific design and brand. Some air fryers have more components that need to be disassembled, which can add complexity to the cleaning process. It's important to clean the air fryer regularly to prevent the buildup of grease and food particles, which can affect its performance and potentially cause odors or smoke.
What is the easiest air fryer model to clean?
When identifying the easiest air fryer model to clean, several factors should be considered, such as design features, the availability of removable and dishwasher-safe parts, and user reviews. While specific models may change frequently as new products are released, here are a few features and models often highlighted for their ease of cleaning:
- Removable and Dishwasher-Safe Parts: Models with baskets and trays that can be easily removed and are dishwasher-safe tend to be simpler to clean. This feature allows users to clean the parts more thoroughly without much effort.
- Non-Stick Coating: Air fryers with a high-quality non-stick coating on their baskets and trays can significantly reduce the amount of scrubbing required, as food residues are less likely to stick.
- Minimal Crevices: Air fryers with a sleek design and minimal crevices tend to gather less dirt and are easier to wipe down.
- Size and Design: Compact models or those with a straightforward design can often be cleaned more effortlessly compared to larger, more complex machines.
As for specific models, here are a few that have been frequently mentioned as easy to clean:
- Philips Airfryer XXL: Known for its high capacity and efficient cooking, this model has dishwasher-safe removable parts, and its design is generally user-friendly in terms of maintenance.
- Ninja Air Fryer: Many Ninja models, like the Ninja AF101, have dishwasher-safe components and are appreciated for their durability and ease of cleaning.
- Instant Vortex Plus: This model is often highlighted for its user-friendly functions and has dishwasher-safe trays and baskets, making cleanup a breeze.
- COSORI Air Fryer Max XL: The non-stick, removable baskets are dishwasher safe, and the model is designed for easy maintenance.
Before purchasing, checking recent reviews and specific product descriptions can provide the latest insights, as manufacturers continually improve the usability and maintenance of their products.
What is the most effective tool for cleaning an air fryer tray?
The most effective tool for cleaning an air fryer tray typically depends on the material of the tray and the type of residue. However, here’s a general approach:
- Soft Sponge or Cloth: For regular cleaning, a soft sponge or microfiber cloth with mild dish soap and warm water is usually sufficient. This prevents scratching and damage to the non-stick coating that most air fryer trays have.
- Non-abrasive Scrubber: For stuck-on food, a non-abrasive scrubber or brush can be useful. Nylon or silicone scrubbers are gentle on surfaces but effective at removing tougher residues.
- Baking Soda Paste: For stubborn grime, a paste made from baking soda and water can be applied to the tray and left to sit for 15-20 minutes before scrubbing. This helps break down tough, baked-on food.
- Vinegar: A vinegar soak can also be effective for removing grease and grime. Fill the tray with a mix of vinegar and water, let it sit for about 30 minutes, and then scrub gently.
- Toothbrush: An old toothbrush can be helpful for cleaning tight spots or grooves in the tray.
- Dishwasher: If the tray is dishwasher safe (check your specific model), running it through a cycle can save time and effort.
Always ensure that the tray and other removable parts are fully cooled before cleaning and that you follow any specific care instructions provided by the manufacturer to avoid damage.
How to clean an air fryer using natural products?
Cleaning an air fryer with natural products is both effective and environmentally friendly. Here's a step-by-step guide to help you clean your air fryer naturally:
- Unplug and Cool Down: Make sure the air fryer is unplugged and has completely cooled down before you begin cleaning.
- Disassemble Parts: Remove the basket or tray and any other removable parts.
- Soak Removable Parts: Fill a basin or the sink with warm water. Add a few drops of mild dish soap and a cup of white vinegar or lemon juice. Submerge the removable parts in the water and let them soak for 15-30 minutes to help loosen any grease or food particles.
- Scrub Removable Parts: Use a soft sponge or a brush to scrub away any remaining residues. Avoid using abrasive materials that could scratch the surfaces. Rinse thoroughly with clean water and set aside to dry.
- Wipe Down the Exterior: Dampen a cloth or sponge with a mixture of equal parts water and white vinegar. Wipe the exterior of the air fryer to remove any fingerprints, grease, or grime.
- Clean the Interior: Use the same vinegar-water mixture to wipe the interior of the air fryer. Be sure to reach into all corners and crevices. For stubborn stains or residue, make a paste using baking soda and a small amount of water. Apply the paste to the area, let it sit for a few minutes, and then scrub gently with a sponge. Wipe clean with a damp cloth.
- Clean the Heating Element: Turn the air fryer upside down to access the heating element. Carefully wipe the heating element with a cloth dampened with the vinegar-water mixture. Be gentle to avoid damaging it.
- Rinse and Dry: Ensure all parts are wiped down and any residue is rinsed away. Allow all components to air dry completely before reassembling the air fryer.
- Reassemble and Store: Once everything is dry, reassemble the air fryer and it’s ready for use or storage.
Tips:
- Regular cleaning prevents buildup and prolongs the life of your air fryer.
- Address spills and splatters promptly after cooking to minimize hard-to-remove residues.
- Avoid immersing the air fryer’s electrical components in water.
How to clean an air fryer heating element?
Cleaning the heating element of an air fryer is important to maintain its efficiency and prolong its lifespan. Here's a step-by-step guide on how to do it safely:
- Safety First: Ensure that your air fryer is unplugged and completely cool before starting the cleaning process. This prevents any risk of electrical shock or burns.
- Remove Accessories: Take out the basket, tray, or any other removable parts of the air fryer. These can usually be cleaned separately according to the manufacturer’s instructions, often simply by washing in warm soapy water.
- Access the Heating Element: Depending on your model, you may need to turn the air fryer upside down or open a specific compartment to access the heating element. Consult your air fryer’s manual if you're unsure about how to do this.
- Remove Loose Debris: Use a soft brush or cloth to gently remove any loose food particles or debris from the heating element. Be careful to avoid applying too much pressure to prevent damaging it.
- Clean the Heating Element: Mix a small amount of mild dish soap with warm water. Dampen a soft cloth or sponge in the soapy solution, then gently wipe down the heating element. Avoid using too much water to prevent moisture from seeping into electrical components. If there are stubborn residues, apply a bit more soap to the cloth and gently scrub until it comes off.
- Rinse and Dry: After cleaning, dampen another cloth with plain water and wipe the heating element to remove any soap residue. To dry, use a dry towel or let it air dry completely before reassembling and plugging in the air fryer.
- Reassemble: Once everything is dry, put the air fryer back together, ensuring all parts are securely in place before using it again.
Additional Tips:
- Avoid using abrasive materials or harsh chemicals on the heating element as these can cause damage.
- Regular maintenance cleaning can help prevent buildup and make deep cleaning easier.
- Always refer to your specific air fryer’s manual for any manufacturer recommendations or warnings.
By following these steps, you can keep your air fryer heating element clean and functioning well.
What is the method for cleaning an air fryer without soaking?
Cleaning an air fryer without soaking can be achieved by following these steps:
- Unplug and Cool Down: Always start by unplugging your air fryer and allowing it to cool down completely. This ensures safety and prevents damage to the unit.
- Remove Baskets and Trays: Take out the basket and any removable trays. These parts are often dishwasher safe, but since you're avoiding soaking, you'll clean them by hand.
- Wipe Down the Exterior: Use a damp microfiber cloth to wipe down the exterior of the air fryer. Avoid using any abrasive cleaners or sponges that might scratch the surface.
- Clean the Interior: Use a soft, damp cloth or sponge with a little bit of dish soap to gently wipe the interior of the fryer. You can use a non-abrasive brush or a toothbrush for any stubborn residue or hard-to-reach areas. Be cautious to avoid the heating element.
- Clean the Basket and Trays: Use a non-abrasive sponge or cloth with mild dish soap to clean the basket and trays. For tougher debris, consider using a paste made from baking soda and water; gently scrub the areas with a brush or sponge.
- Rinse and Dry: After cleaning, rinse the cloth or sponge and go over the parts again to remove any soap residue. Finally, dry all parts thoroughly with a clean towel to avoid any water spots or damage.
- Check the Heating Element: If there is any residue on the heating element, wipe it gently with a damp cloth. Ensure it’s completely dry before using the air fryer again.
- Reassemble: Once all parts are clean and dry, reassemble the air fryer.
Regular maintenance after each use will help keep your air fryer in good condition and minimize the need for deeper cleaning sessions.